
iPhone Photography Tips
Fix Everyday Photo Problems
After shooting and reviewing everyday iPhone photos, I’ve found that most weak shots come from a few fixable habits: missed focus, poor exposure, harsh light, cluttered framing, awkward lens choice, or too much zoom. These iPhone photography tips will help you fix blurry, dark, or messy photos with simple shooting and editing habits you can use right away.
These iPhone photography tips will help you slow down just enough to make cleaner, sharper, more intentional photos with the phone you already use.
Key Takeaways
Check the light, subject, background, and frame edges before taking each photo to avoid common distractions.
Tap to focus on your subject, then adjust exposure before shooting bright, dark, or backlit scenes.
Choose 0.5x, 1x, or telephoto based on the scene, not just how close you are.
Use Burst mode or Live Photos when photographing kids, pets, movement, group shots, or unpredictable expressions.
Edit lightly by cropping, straightening, and adjusting light first, so photos still look natural.
BOB WILD FINE ART
FEATURED GALLEY

What to check before taking an iPhone photo?
Check the light, subject, background, and frame edges before you press the shutter.
That simple order resolves many common problems. Look for where the light is coming from, decide what the photo is really about, clean up distractions behind the subject, and then scan the corners and edges for anything unwanted.
A quick edge check helps you catch poles behind heads, bright signs, messy countertops, cut-off hands, half-visible bags, and random objects near the border. Small changes in where you stand can make the photo feel much cleaner.
Try moving one step left, lowering the phone, or getting closer before you open another camera setting. Often, the best solution does not involve using a specific feature. It’s a better position.
How do you control focus and exposure on iPhone?
Tap the screen to set focus, then slide the exposure control up or down to adjust brightness.
This gives you more control when the iPhone guesses wrong. It’s useful for backlit portraits, food photos, close-ups, window light, sunsets, snow, neon signs, and bright skies. If highlights are too bright, lower exposure on purpose before taking the shot.
For scenes where the camera continues to refocus, use AE/AF Lock. Press and hold on your subject until the lock appears. This keeps focus and exposure from shifting while you reframe or wait for the right moment.
AE/AF Lock helps with food on a table, flowers close to the lens, portraits against bright windows, and any scene where your subject stays in one place. Unlock it when you move to a new angle or the light changes.
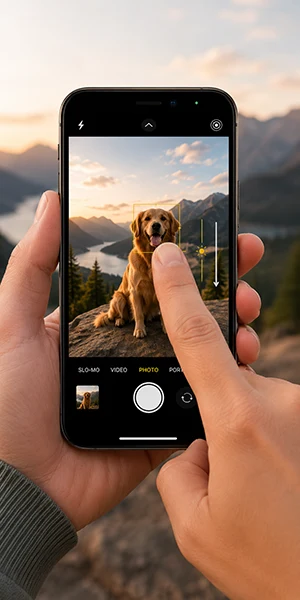
Which iPhone lens should you use?
Use 1x for natural everyday photos, 0.5x for wide dramatic scenes, and telephoto when your iPhone has it and you need reach or compression.
Lens choice changes the look of the photo. The 1x lens is usually the safest choice for people, street scenes, food, travel, and family photos. It gives a natural view without stretching faces or shrinking the background too much.
The 0.5x lens can make small spaces, architecture, landscapes, and low-angle shots feel more dramatic. Keep people near the centre if you use it, since wide lenses can stretch faces and bodies near the edges.
Telephoto options, where available, are useful for portraits, pets, distant details, and cleaner backgrounds. Be careful with unsupported zoom levels. Depending on your iPhone model, some zoom ranges may crop the image or use digital zoom, which can make photos look softer.
.
Use composition to remove clutter.
Composition is not about memorizing rules. It’s about making the subject easy to see.
Turn on grid lines if they help you keep horizons straight and place subjects with more care. The rule of thirds can work well for people, landscapes, food, and travel photos, but it’s not required for every shot.
Use leading lines when they’re already in the scene. Roads, fences, hallways, shadows, tables, shorelines, and window frames can guide the viewer’s eye toward the subject.
Look for foreground interest too. A flower, coffee cup, doorway, branch, or railing can add depth, as long as it doesn’t block the subject. If the frame feels busy, simplify it. Move closer, change angles, or wait until people leave the background.
Shoot first, choose later for movement.
Some moments are too fast for one perfect shutter press. Kids, pets, sports, group photos, laughter, wind, waves, and candid expressions often need several frames.
Use burst mode when the action is quick, and you want to choose the sharpest frame later. This helps when someone is jumping, a dog is running, or a child keeps moving their hands and face.
Live Photos can also help with small timing mistakes. You may be able to choose a better key photo after the shot. It’s handy for group photos, blinking, small expressions, and casual moments.
Don’t leave every photo as a Live Photo if you don’t need the motion. Use it when timing is uncertain, then choose the best still frame and keep your library tidy.
Take better night and low-light photos.
Night photos usually fail for two reasons: the phone moves or the subject moves.
When Night mode appears on supported iPhones, hold the phone as still as you can. Rest it on a table, wall, railing, bench, or any stable surface. A steady phone allows the camera more time to collect light.
Night mode works best for still scenes: city streets, buildings, signs, landscapes, interiors, and posed portraits where people can stay still. It’s less helpful for fast-moving kids, pets, traffic, or people walking through the frame.
If your iPhone lets you adjust Night mode, make sure to use a shorter time for handheld shots and moving subjects. Use a longer time only when the phone is stable and the scene is calm.
Lower exposure for neon signs, bright windows, night markets, and streetlights. Protect the highlights first, then lift shadows slightly during editing if needed.
iPhone photography tips for common problems
|
Common problem |
Quick fix |
iPhone feature or habit |
|---|---|---|
|
Blown-out sky |
Lower exposure before shooting |
Exposure slider or AE/AF Lock |
|
Blurry pet photo |
Take several frames |
Burst mode or Live Photos |
|
Crooked landscape |
Align, then straighten |
Grid and Photos app |
|
Distracting background |
Move or simplify |
Lens choice or Portrait mode |
|
Soft night photo |
Stabilize the phone |
Night mode and stable surface |
|
Dull image |
Make a light edit |
Contrast, warmth, highlights, shadows |
Use these iPhone photography tips as a quick check before changing camera settings.
Use Portrait mode when it helps separate a person, pet, or object from the background. Take precautions, as it can struggle with hair, edges, busy scenes, or subjects that move.
For food, move near a window and shoot from the angle that shows the shape best. Flat lays work for table spreads. A lower angle works better for burgers, drinks, cakes, and stacked food.
For landscapes and travel, take one wide scene, one medium view, and one detail. This gives you variety without relying on heavy zoom.
Edit lightly in the Photos app.
Editing should fix the photo problem, not bury it.
Start with cropping and straightening. A tighter crop can remove clutter and make the subject stronger. Straightening helps landscapes, buildings, tables, and shorelines feel more polished.
Then adjust exposure, highlights, shadows, contrast, and warmth. Lower highlights if skies, windows, or faces are too bright. Lift shadows only enough to show detail. Add contrast when the image feels flat.
Warmth can help food, sunsets, skin tones, and indoor photos. Too much warmth can make whites look yellow, so check the whole frame before saving.
If you shot several photos in the same light, copy and paste edits to keep the set consistent. This works well for travel, food, family photos, and quick product shots. Still, check each image after pasting. One photo may need a slightly different crop or exposure.

Conclusion
The best iPhone photography tips are not complicated. Slow down, set focus, protect highlights, choose the right lens, and clean up the frame before you shoot. Then use simple edits to finish the photo without making it look forced.
About Author
Bob Wild is a photographer, the creator of Phone Photo Guide, and the founder of Who Said Photography. He shares practical mobile photography tips based on real shooting situations, including portraits, natural light, composition, and everyday phone editing.