
iPhone Photography Guide
How To Capturing Stunning Photos
If you’ve ever tried iPhone photography and felt like your photos don’t match what you see, you’re not alone.
The camera is capable of producing sharp, high-quality images, but the results depend on how you use it.
In this guide, you’ll learn simple techniques to take better photos by improving composition, using light effectively, and making small adjustments to your camera settings.
These are practical changes you can apply right away to capture cleaner, more natural-looking images.

Key Takeaways
Learning how to shoot photos with your iPhone starts with understanding your camera settings and features.
Good composition, steady hands, and proper lighting make a big difference in photo quality.
Landscape photos often look best when you use the rule of thirds and include foreground elements.
Features like Portrait mode, Night mode, and HDR can improve your photos in different lighting conditions.
Simple editing tools can enhance colour, contrast, and detail without making photos look unnatural.
Understanding your camera
Before you focus on techniques, it helps to understand how your camera works.
Most camera phones now have multiple lenses and use software to improve your photos automatically. Knowing how your camera behaves helps you make better decisions when shooting.
Your iPhone also uses software to process photos automatically. This improves color, brightness, and detail, but it can sometimes make images look unnatural if you rely on it too much.
The goal is to take a bit of control. When you understand what the camera is doing, you can make better decisions before you even press the shutter.
Best iPhone camera settings
Before trying advanced techniques, it helps to learn the basics of photography. Once I started paying attention to simple things like stability, focus, and composition, my photos improved right away.
These are the settings I check first before taking photos. A few small changes here can make a noticeable difference in your image quality.
Turn On Grid Line
Turn on the grid in your camera settings to help line up your shots. It makes it easier to keep horizons straight and place your subject in a better position. It’s a simple tool that helps you avoid crooked or unbalanced photos.
Use Focus and Exposure
Tap your subject to focus, then slide up or down to adjust brightness. This gives you quick control over how light or dark your photo looks. It helps prevent blown-out skies or dark subjects.
Use Live Photos
Live Photos captures a short burst of images before and after you press the shutter. You can go back and pick the sharpest frame later. It’s especially useful if your hands move or your subject isn’t perfectly still.
Use (HEIF vs JPEG)
Live Photos captures a short burst of images before and after you press the shutter. You can go back and pick the sharpest frame later. It’s especially useful if your hands move or your subject isn’t perfectly still.
View Outside the Frame
This setting shows extra space around your photo while you’re composing. It helps you see what’s just outside the shot so you can adjust before taking the picture. It’s useful for framing more carefully without guessing.
How to use camera controls
Using the right camera controls can make a big difference in your photos. Learn how to adjust focus, exposure, and lenses to improve image quality and get more consistent results.
Essential iPhone camera settings for quality photos
Your iPhone camera works well right out of the box, but a few settings can make a big difference in your photos. Once you learned how these settings work, it became easier to capture clear landscapes, city scenes, and everyday moments.
The settings below are some of the most useful tools for improving image quality.
HDR Mode: When and How to Use It
HDR Mode: When and How to Use It
HDR stands for High Dynamic Range. This feature helps your camera capture both bright and dark parts of a scene.
The phone takes several photos at different exposures and combines them into one balanced image.
HDR works especially well for:
- bright landscapes
- sunsets and sunrises
- scenes with strong shadows
- photos with bright skies
To turn on HDR:
Open Settings -Tap Camera- Enable Smart HDR
Using HDR can help keep details in clouds, water, and other bright areas of landscape photos.
Live photos vs standard photos
You can capture images in two ways: Live Photos or standard photos.
Live Photos record a few seconds of motion before and after you press the shutter button. This creates a short moving image.
Standard photos capture a single still image.
Live Photos can be useful when photographing:
• moving water
• waves
• windy landscapes
• people in motion
If you prefer simple still images, you can turn Live Photos off in the camera app.
When to use each different camera mode
Each camera mode is designed for a specific situation. Knowing when to use them helps you get better results without relying on editing later.
|
Mode |
Best Used For |
|---|---|
|
Photo |
Everyday photos and landscapes |
|
Portrait |
People and close-up subjects |
|
Night |
Low-light scenes |
|
Panorama |
Wide landscapes and large views |
|
Burst |
Action shots and moving subjects |
Advanced camera features
Once you are comfortable with the basics, you can start experimenting with more creative techniques. There are several features that make it easier to capture wide landscapes, action shots, and unique perspectives.
These techniques take a bit more practice, but they can help you get more creative with your camera phone.
Panorama photography
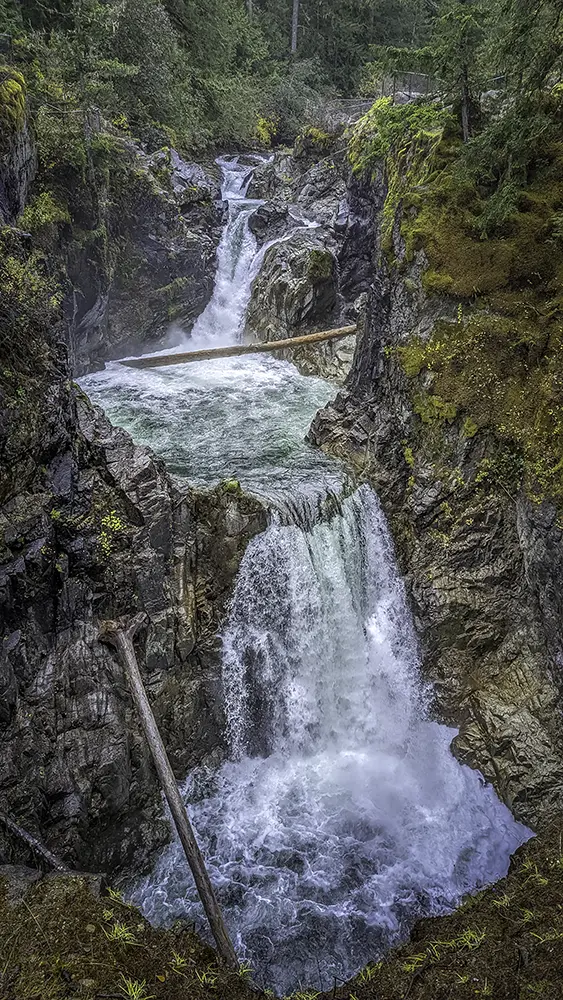
Panorama mode allows you to capture wide scenes that don’t fit into a single photo. This feature works well for large landscapes such as mountains, lakes, coastlines, or city skylines.
By slowly moving your phone across the scene, you’re stitching multiple images together into one wide photo.
Macro photography
Macro photography focuses on small details that are easy to miss. Close-up photos of flowers, textures, insects, or plants can reveal patterns and colours that are not visible from a distance.
Simple composition tips
Good composition doesn’t need to be complicated. A few small adjustments can make your photos look cleaner and more balanced right away.
Use the grid to line up your shot
Turn on the grid in your camera settings to help guide your framing. It makes it easier to keep your horizon straight and place your subject in a better position on the screen. This is a quick way to improve your photos without guessing
Keep your frame clean
Before taking a photo, take a second to look around the edges of your frame. Remove distractions by moving slightly or changing your angle. Even a small shift can make your subject stand out more and improve the overall look of the image.
Add depth with foreground elements
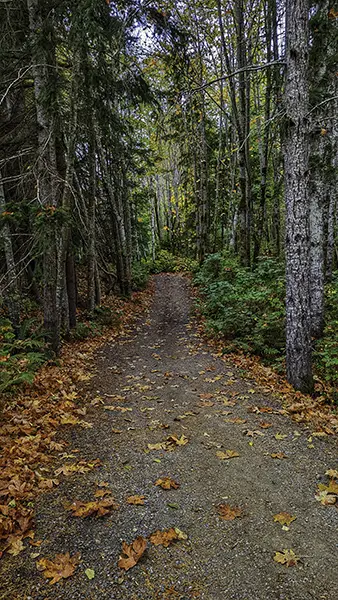
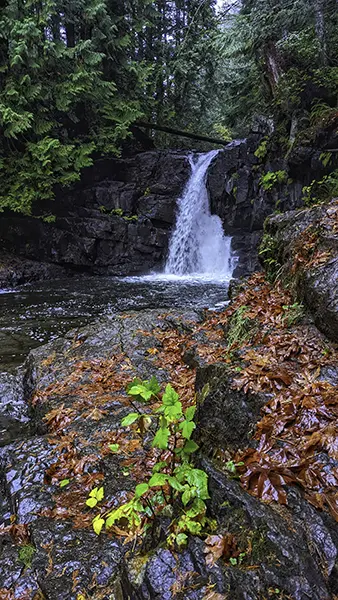
To make your photos feel less flat, try including something in the foreground. This could be a path, a fence, or nearby objects. It helps guide the viewer’s eye into the scene and adds a sense of depth, especially in landscape shots.
Mastering light for better photos
Light has a bigger impact on your photos than any setting or feature on your iPhone.. The same scene can look completely different depending on the time of day and the direction of the light.
When taking photos outdoors, try to pay attention to where the light is coming from and how it affects the colours, shadows, and overall mood of the scene.
Golden Hour Lighting
Golden hour happens shortly after sunrise and before sunset.
The light is softer and warmer during this time, which helps create natural colours and gentle shadows.
This type of lighting works especially well for landscapes, lakes, forests, and wide outdoor scenes.
Shooting in Bright Sunlight
Bright sunlight can create strong shadows and very bright highlights.
When I photograph landscapes during the day, I often lower the exposure slightly. This helps protect the sky and keeps bright areas from looking washed out.
Photographing on Cloudy Days
Cloudy weather can actually be great for photography.
Clouds soften the light and reduce harsh shadows, which can help bring out colours and details in landscapes, forests, and waterfalls.
Editing your photos
Editing helps bring out the best in your photos. Even small adjustments can improve brightness, colour, and detail without making the image look unnatural.
Most of the time, I only make a few simple changes before sharing or saving my photos.
Basic edits in the photos app
The built-in Photos app includes several useful editing tools.
You can quickly adjust:
• brightness
• contrast
• highlights and shadows
• colour and saturation
Small adjustments are often enough to improve landscape photos and everyday images.
Using editing apps
Some photographers prefer using dedicated editing apps like Lightroom and SnapSeed for more control. These apps offer tools for colour adjustments, filters, and selective editing.
They can be helpful when you want more control over how your photo looks.
Creating a consistent style
Many photographers develop a consistent editing style. This can be done by using similar colour tones, contrast levels, or filters across multiple photos.
Keeping edits simple usually produces the most natural-looking results.
Conclusion
Learning how to shoot photos with your iPhone doesn’t require complicated equipment or technical knowledge. Once you understand the basics of your camera, composition, and lighting, it becomes much easier to capture clear and balanced photos.
Most of the improvements come from simple habits such as holding your phone steady, paying attention to light, and thinking about how elements are arranged in the frame.
With practice, your iPhone can capture beautiful landscapes, everyday scenes, and even portraits. The more you experiment with different locations, lighting conditions, and camera modes, the more confident you will become with your photography.