
Using Lightroom Mobile App for Phone Photo Edits: Perfecting Your Edits

Bob Wild
Fine Art Photographer, Vancouver Island
Founder of Who Said Photography – 20+ years shooting, – I test every tip on real shoots before it goes on the page
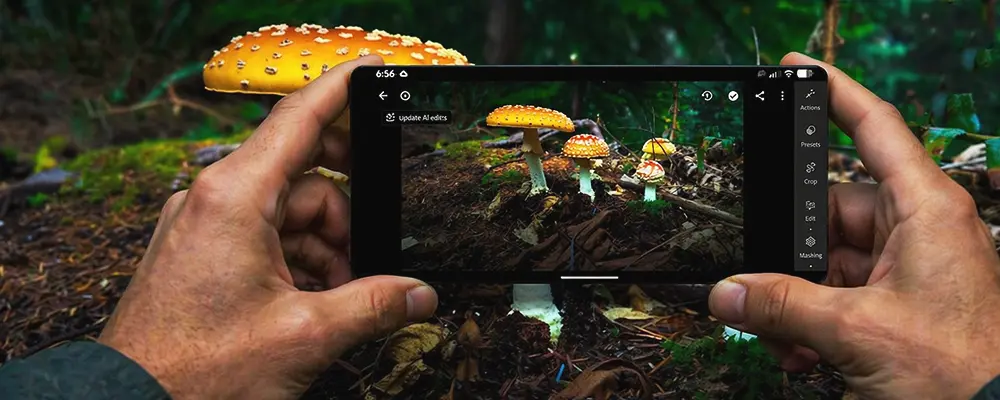
The reason I’ve fallen in love with using the Lightroom mobile app, it helps me edit phone photos quickly before I post them to social Media . Most of my images don’t need a dramatic edit. They usually just need a small exposure change, a tighter crop, or a simple distraction removed.
This is especially useful for social media, where speed matters. I can take a photo on a hike, make a few careful edits, and share a better-looking image before getting back to the car. I still start with a sharp photo and good light, but Lightroom helps the final image look closer to what I saw.
Key Takeaways
Start with light adjustments before changing colours, so the photo stays natural.
Crop only when it strengthens the subject, balance, or overall composition.
Use presets as starting points, then fine-tune each photo by hand.
Apply selective edits to fix small problem areas without changing everything.
Accept that editing improves good photos, but cannot rescue every bad one.
What is Lightroom Mobile?
The Lightroom mobile app is best used for quick, controlled photo edits on a phone, especially when you want better light, colour, cropping, and detail than the default photo editor gives you.
This matters because Lightroom Mobile is useful for everyday photos, travel images, portraits, landscapes, food, pets, and social media images. It works best when the original photo is reasonably sharp and well composed.
Phone photos often have one clear problem. A forest photo may look dull, a waterfall may have bright white areas, or a travel photo may feel crooked. Lightroom Mobile gives you focused tools for those common issues.
It is not a magic fix for heavy blur, missed focus, or a photo with no clear subject. A good edit still starts with a decent photo.
Is Lightroom Mobile for beginners?
Lightroom Mobile is good for beginner phone photographers because the basic tools are easy to learn, the edits are flexible, and you can improve a photo without needing desktop software.
This matters because beginners get better results by learning a small set of tools first. Start with crop, exposure, highlights, shadows, white balance, vibrance, and detail before trying advanced features.
For a dark indoor photo, raise exposure slightly, lift the shadows, cool down overly warm light, and crop out clutter at the edge of the frame. A simple edit often looks more natural than a heavy one.
Some tools and cloud features may require a paid Adobe plan, so check Adobe’s current details before relying on a specific feature.
What to edit first?
Edit light and white balance first because those two changes usually fix the biggest problems in phone photos.
This matters because crop, detail, and selective edits work better once the overall brightness and colour feel right. It also stops you from moving random sliders without a clear goal.
Start with exposure for overall brightness. Use highlights to recover bright skies or shiny water. Use shadows to open dark trees, faces, or foregrounds. Then adjust temperature and tint to fix the colour.
For a sunset photo, you may need lower highlights, slightly brighter shadows, and warmer colour before adding any sharpening or extra detail.
Simple editing workflow
A simple workflow keeps your edits natural and repeatable. Before opening any slider, choose the best version of the photo. Pick the image with the sharpest subject, cleanest expression, or strongest composition.
For a hiking photo, you might straighten the horizon, lift shadows in the trees, reduce bright sky highlights, add slight vibrance, and crop to emphasize the trail. That kind of edit improves the photo without making it look fake.
|
Editing Step |
Tool to Use |
What it Fixes |
When To Stop |
|---|---|---|---|
|
Crop and straighten |
Crop tool |
Messy edges or tilted lines |
The subject feels clear, and the frame looks balanced. |
|
Adjust exposure |
Light panel |
Overall brightness |
Nothing important looks washed out or too dark. |
|
Recover highlights and shadows |
Light panel |
Bright skies and dark areas |
Detail returns without the image looking flat. |
|
Colour panel |
Warm or cool colour casts |
Whites and skin tones look natural. |
|
|
Adjust vibrance or saturation |
Colour panel |
Weak or dull colour |
Colours look real, not neon. |
|
Add sharpening |
Detail panel |
Mild softness |
Edges improve without adding obvious noise. |
|
Use selective edits or healing |
Masking or removal tools |
Local problems or distractions |
The fix is not obvious. |
Use the Lightroom mobile app when you want a clean phone editing workflow you can repeat. Save or export a copy for sharing, then compare the before-and-after versions. If the edited version looks heavier than the original, pull back.
Which tools to learn after the basics?
Once the basic sliders feel comfortable, learn presets, masking, healing, geometry, and raw or DNG editing. You do not need all of them right away.
Presets are useful starting points, not finished edits. A preset that works on a sunny beach photo may look strange on a shaded forest path. Adjust exposure, colour, and crop after applying one.
Masking or selective edits help when only one area needs work. For example, brighten a person’s face in shade instead of raising exposure across the whole photo.
Healing or removal tools can clean up small background distractions, such as a small sign, dust spot, or object near the edge of the frame. Geometry helps with crooked buildings, interiors, and vertical lines.
Raw or DNG support can help advanced phone shooters recover more detail, but beginners can still make strong edits from regular phone photos.
Common Lightroom Mistakes
The most common mistake is doing too much. Heavy saturation, strong clarity, and aggressive sharpening can make a phone photo look crunchy and unnatural.
Be careful with skin tones. Warm indoor light can make faces too orange, while too much cooling can make skin look grey. Fix white balance before boosting vibrance.
Do not try to rescue a blurry photo with sharpening. Lightroom can improve mild softness, but it cannot truly repair motion blur or missed focus. For more help, review why phone photos look blurry before blaming the editing app.
Also avoid applying the same preset to every photo. A waterfall, food photo, pet portrait, and night street scene all need different choices. Use the before-and-after view often so your edit stays believable.
Why use Lightroom over the built-in editor
Use your phone’s built-in editor for quick crops, simple brightness changes, and casual sharing. It is often enough for a family snapshot, a receipt, or a quick pet photo.
Use Lightroom Mobile for better colour control, selective edits, presets, a raw or DNG workflow, or a more consistent style across photos. It is a better choice for landscapes, portraits, product photos, travel images, or photos you plan to post or print.
Other mobile photo editing apps may be better for creative filters, text, collages, or social media effects. Use the simplest tool that gets the result you need.

RECOMMENDED EDITOR
Skylum mobile photo editor – For when you outgrow the build in phone editor
The desktop & mobile editor I reach for my serious shots. Free 30-day trial
Conclusion
The Lightroom mobile app is worth learning if you want cleaner, more controlled phone photo edits. Start with light, fix white balance, crop with purpose, and use detail tools lightly.
You do not need to master every feature. A few smart adjustments can make a dull forest walk, bright-sky landscape, indoor family photo, or shaded portrait look more natural and finished. The best edits support the photo instead of taking it over.
About Bob Wild
Bob is a fine-art photographer on Vancouver Island and the creator of Phone Photo Guide, and the founder of Who Said Photography. He shares practical mobile photography tips based on real shooting situations, including portraits, natural light, composition, and everyday phone editing.