
How to Take Better Android Photos: 8 Easy Fixes That Work

Bob Wild
Fine Art Photographer, Vancouver Island
Founder of Who Said Photography | 20+ years shooting | I try and test every tip on real shoots before it goes on the page
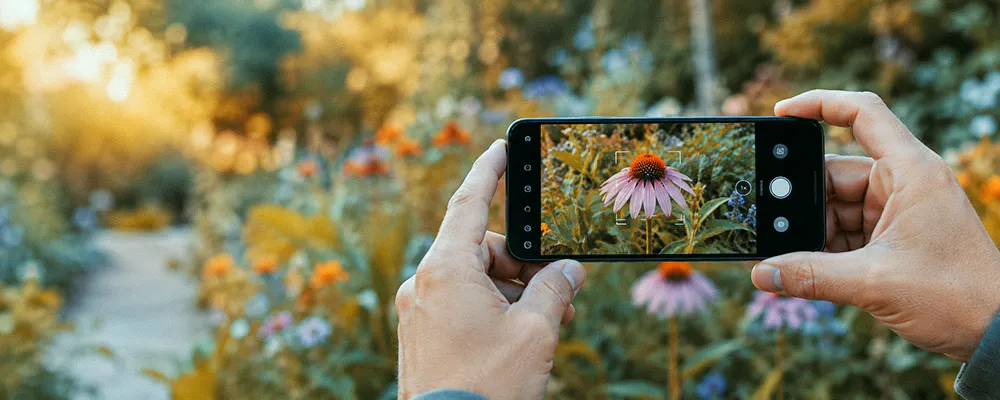
I’ve taken Android photos that looked amazing on the screen but turned out blurry, too dark, or cluttered when I viewed them later on the computer. I’ve also learned that using zoom often made the image look worse instead of bringing the subject closer.
Learning how to take better Android photos doesn’t require a new phone or complicated camera settings. What helped most was slowing down, checking the scene, tapping to focus, holding the phone steady, and making small edits afterward. I know that the controls vary between Samsung, Pixel, Motorola, OnePlus, and other Android phones, but the basic habits work on almost any device.
Key Takeaways
Clean the camera lens first so fingerprints don’t soften detail or reduce contrast.
Tap the main subject to improve focus and set a more useful exposure.
Use soft natural light to capture cleaner colour, detail, and skin tones.
Hold the phone steadily or use a tripod when available light is limited.
Crop, straighten, and adjust colour lightly so the final image looks natural.
Why you’re android photos look soft?
Android photos can look soft because the lens is dirty, your focus missed the subject, or the phone moved during capture.
This matters because changing modes or resolution settings in the camera app won’t fix fingerprints or camera shake. Start with the simplest causes before troubleshooting the phone camera itself.
Wipe the camera lenses with a clean microfiber cloth. A fingerprint can spread light across the image, reduce contrast, and make bright areas look hazy. Check every rear lens, not just the one you expect the camera to use.
Next, look at how you’re holding the smartphone. Use both hands, keep your elbows close to your body, and press the shutter gently. In low light, brace the phone against a table, wall, railing, or another stable surface.
A small tripod can help when you take photos at night, photograph food indoors, or want consistent framing. It won’t stop a moving child or pet, but it can prevent movement from the phone itself.
If your photos are always blurry do this quick test, photograph the same subject twice. Take one image normally, then clean the lens, brace the phone, and take another shot. Comparing the results can help you identify whether softness comes from technique or another issue.

How should you set focus and exposure?
Tap the main subject on the screen before you take a photo.
This tells the camera which part of the scene should appear sharp. It can also help the camera app choose a more suitable exposure for a face, pet, flower, plate of food, or another important subject.
After tapping, many Android camera apps display a focus box or circle. Some also show a brightness slider beside it. Move that control slightly up if the subject looks too dark or down if bright areas are losing detail.
Some apps let you adjust white balance in a Pro or manual mode. White balance changes how warm or cool the colour appears, but beginners usually don’t need to adjust it for everyday photography. Automatic white balance is a good option to start with.
Focus can become more difficult when:
- The subject is moving quickly.
- The scene is very dark.
- You’re standing too close for the selected lens.
- The camera focuses on a bright background instead of the subject.
- An object passes between the phone and your subject.
Tap again whenever the subject moves or you change the composition. Don’t assume the first focus point will remain correct.
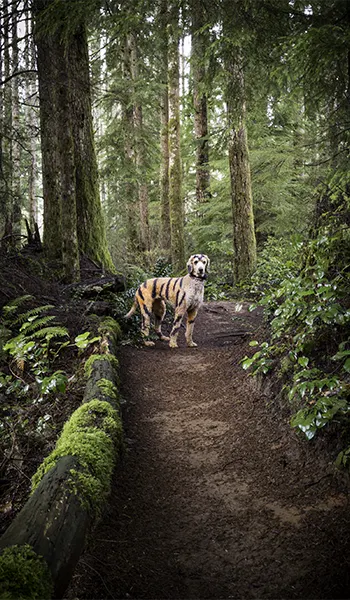
How to take better android photos before shooting
The fastest way to take better photos is to pause and check the scene before pressing the shutter. This simple routine is one of the most reliable ways to learn how to take better Android photos without changing advanced settings.
Use this short routine:
- Clean the lens.
- Find the best available light.
- Choose the main subject.
- Check the background and frame edges.
- Select the most suitable lens or mode.
- Tap the subject to focus.
- Hold the phone steadily.
- Take two or three versions.
Check for bright signs, lamps, bins, branches, or people that pull attention away from the subject. Moving one step sideways can often remove a distraction without changing any camera settings.
Watch the edges of the frame as carefully as the centre. Avoid cutting through hands, feet, heads, plates, or important objects unless the crop looks intentional.
Turn on the grid when it helps you keep horizons straight or position the subject away from the centre. The rule of thirds can strengthen some compositions, while symmetry and centred framing may work better for buildings, reflections, food, or simple portraits.
|
Visible Problem |
Quick fix |
|---|---|
|
Blurry subject |
Tap to focus and hold the phone with both hands |
|
Dark face |
Turn the person toward a window or soft light |
|
Harsh highlights |
Lower exposure slightly or change your angle |
|
Cluttered background |
Move sideways or get closer to the subject |
|
Moving child or pet |
|
|
Weak zoom detail |
Move closer or try a fixed lens button |
Choose the right lens, not more zoom
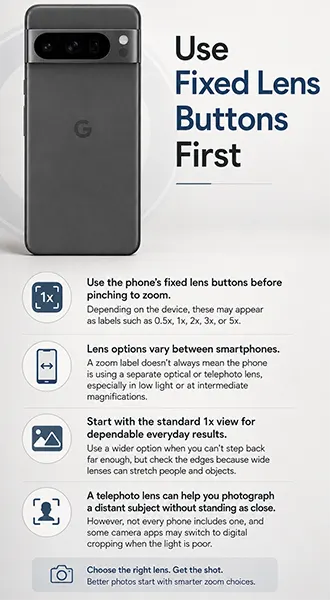
Use the phone’s fixed lens buttons before pinching to zoom. Depending on the device, these may appear as labels such as 0.5x, 1x, 2x, 3x, or 5x.
Lens options vary between smartphones. A zoom label doesn’t always mean the phone is using a separate optical or telephoto lens, especially in low light or at intermediate magnifications.
Start with the standard 1x view for dependable everyday results. Use a wider option when you can’t step back far enough, but check the edges because wide lenses can stretch people and objects.
A telephoto lens can help you photograph a distant subject without standing as close. However, not every phone includes one, and some camera apps may switch to digital cropping when the light is poor.
For distant subjects, move closer whenever it’s safe and practical. Excessive pinch-to-zoom can reduce detail because the phone may enlarge and crop the image digitally.
Take one wider photo as insurance. You can crop it later if the zoomed version looks soft.
Match Camera Modes to the Scene
Start in standard photo mode, then choose another mode when it solves a specific problem.
-
Portrait mode: Use it for a person or object with a clear outline. Check hair, glasses, and frame edges for artificial background blur.
-
Night mode: Use it for a still scene in low light. Hold the phone steadily or place it on a tripod during capture.
-
Burst mode: Use it for children, pets, sports, or other movement. It works best when there’s enough light.
-
HDR: Use it when the scene contains both bright and dark areas. The camera app may apply HDR automatically.
-
Panorama: Use it for wide landscapes or interiors. Move slowly and keep the on-screen guide level.
Mode names and availability differ by phone and software version. A particular mode can help in the right situation, but it doesn’t automatically produce better photos.
Advanced controls such as shutter speed, ISO, RAW capture, and manual white balance are optional next steps. They aren’t necessary for improving most everyday photography.
Edit Lightly After the Shot
Begin by cropping and straightening the image. Correct a tilted horizon, and place attention back on the subject.
Next, make small adjustments to brightness, highlights, shadows, and colour. Lowering highlights can recover some detail in bright skies or windows. Raising shadows slightly can make a dark face easier to see.
Avoid pushing every slider. Strong saturation, sharpening, clarity, or artificial background blur can make skin, grass, skies, and edges look unnatural.
Compare the edited image with the original before saving. The edit should improve the photograph without becoming the first thing viewers notice.
Keep Learning
Your next move with the camera
You’ve got the controls. These are the guides I’d hand you next. Each one picks up where the other left off. Written from the same real photo shoots
-
How to Take Better Photos With Your Phone
How to Take Better Photos With Your Phone How to take better photos with your phone starts with…
-
How to Use Android Camera Controls for Better Photos
How to Use Android Camera Controls for Better Photos I’ve found that most beginners don’t need more camera…
-
How to Use iPhone Burst Mode for Moving Subjects
How to Use iPhone Burst Mode for Moving Subjects A moving subject can change position between the moment…




RECOMMENDED EDITOR
On1 Photo RAW – For when you outgrow the build in phone editor
The mobile editor I reach for my serious shots. Free 30-day trial
Conclusion
The easiest way to learn how to take better Android photos is to follow the same routine each time. Clean the lens, find soft light, tap the subject, steady the smartphone, check the grid and frame edges, and avoid unnecessary digital zoom.
These habits help you take better photos before you rely on specialised modes or editing. Use a telephoto lens, burst mode, tripod, graduated neutral density filter, or light editing only when each one solves a visible problem.
About Bob Wild
Bob is a fine-art photographer on Vancouver Island and the creator of Phone Photo Guide, and the founder of Who Said Photography. He shares practical mobile photography tips based on real shooting situations, including portraits, natural light, composition, and everyday phone editing.