
iPhone Camera Timer Guide: Simple Steps for Better Photos

Bob Wild
Fine Art Photographer, Vancouver Island
Founder of Who Said Photography | 20+ years shooting | I try and test every tip on real shoots before it goes on the page
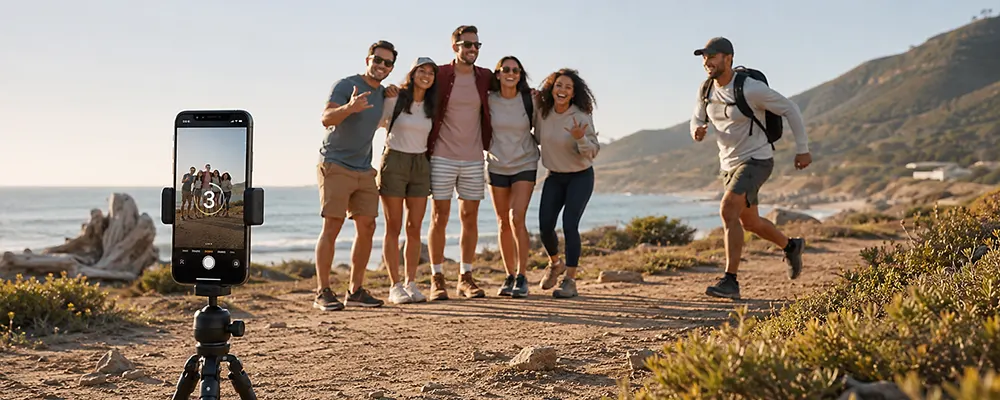
I’ve use my iPhone camera timer when shooting on a tripod in low light. Pressing the shutter button by hand can move the phone just enough to soften the image, even when everything looks steady.
Setting a short delay gave the phone time to settle before the photo was captured, which helped me get sharper results. Here’s how to find the built-in timer, choose the right setting, and prepare the shot before the countdown begins.
Key Takeaways
Swipe up in Photo mode to reveal the hidden Camera Controls.
Select a 3-, 5-, or 10-second delay before taking the photo.
Set focus and exposure before you tap the shutter button.
Use a tripod or stable surface to reduce low-light blur.
Turn the timer off when you finish the timed photographs.
How do you set the iPhone camera timer?
Open the Camera app in Photo mode, reveal Camera Controls, tap the timer icon, and select a 3-, 5-, or 10-second delay.
This matters because the timer icon is usually hidden rather than displayed at the top of the screen. On current iPhones, you can open the controls by tapping the controls icon or swiping up above the camera modes.
To set a timer:
- Open Apple’s native Camera app.
- Select Photo mode.
- Tap the Camera Controls icon, or swipe up above the mode selector.
- Tap the clock-shaped timer icon.
- Select 3s, 5s, or 10s.
- Compose the image and tap the shutter button.
- Move into place while the on-screen countdown runs.
The camera automatically takes a photo when the countdown reaches zero. Depending on your iPhone and iOS version, the flash may blink to show that time is running out.
On some older iPhone models or software versions, you may see an arrow at the top of the screen instead of the current controls icon. Tap that arrow, then scroll through the pop-up controls until you find the timer.

Which timer setting should you use?
Use three seconds to let the phone settle, five seconds when you’re standing nearby, and ten seconds when you need time to enter the frame.
Choosing the right delay matters because a timer that’s too short makes you rush. A delay that’s too long can make a group lose their expressions before the camera takes the shot.
|
Timer |
Best use |
Main benefit |
|---|---|---|
|
3 seconds |
Tripod and low-light photography |
Reduces movement after pressing the shutter |
|
5 seconds |
Nearby portraits and selfies |
Gives you time to settle naturally |
|
10 seconds |
Group and full-body photos |
Gives you time to enter the frame |
The three-second photo timer is my go to setting when the iPhone is already locked onto a tripod. Five seconds works well for a selfie or portrait when you only need to move a short distance. Select ten seconds for group shots or when the phone is farther away.
How do you keep the camera steady?
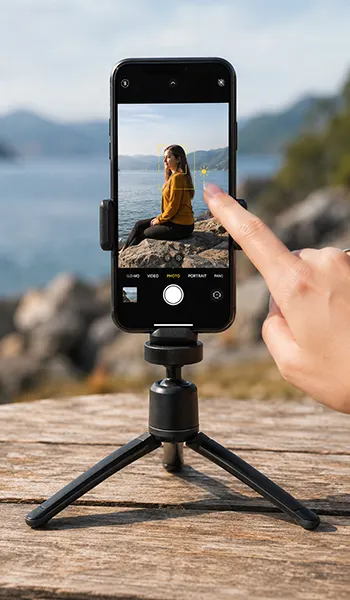
Place the iPhone on a tripod, phone stand, or firm horizontal surface before you start the timer.
Stability matters because a self-timer can’t fix movement caused by an uneven shelf, flexible table, or poorly balanced phone. The delay only stops your hand from moving the camera as you press the shutter button.
Before you use the timer, check that the lenses aren’t blocked and the phone won’t slide. Avoid balancing it on clothing, cushions, or a loose stack of books.
Tap the main subject to set focus, then adjust exposure manually if the photo looks too bright or dark. On most iPhones, you can drag the small sun icon beside the focus box to change brightness before the countdown.
Prepare the photo before the countdown
The timer delays the capture, but it doesn’t improve your composition automatically. Frame the photograph, set focus, check the light, and decide where everyone will stand before starting it.
Look around the edges of the screen for distracting objects, cropped feet, or bright windows. A small change in camera position can often produce a cleaner image than editing the photo later.
For a group photo, tap a person near the centre to set focus. When you’re photographing yourself, place an object where you’ll stand, lock the focus and exposure if needed, then remove the object before starting the timer.
Soft window light or open shade is usually easier to use than harsh overhead light. In low-light conditions, keep the iPhone completely still and ask your subjects to hold their position until the shot is finished.
Common camera timer problems
When the timer control is missing, confirm that the camera is in a still-photo mode. Tap the controls icon, swipe up, or look for an arrow at the top to reveal the additional camera settings.
The exact instruction can vary slightly on an older iPhone. Screenshots from previous iOS versions may also show a different menu, even though the timer still uses a clock or timer icon.
Some iPhones or software versions may capture multiple images during a timed shot. Timer behaviour isn’t identical across every model, so don’t assume the camera will always create a burst of 10 or exactly 10 shots. Open the Photos app or gallery and keep the sharpest frame.
The timer may also remain enabled after you take a photo. Check the timer setting before your next quick shot so an unexpected countdown doesn’t cause you to miss the moment.
How to turn the timer off
Open Camera Controls, tap the timer, and select Off. This disables the delay so the camera takes the photo as soon as you press the shutter.
You may also be able to stop an active countdown with an on-screen cancel control. Its position can change between iOS versions.
Can you use the timer for selfies and portraits?
You can use the timer with the front-facing camera in supported Photo and Portrait modes. Switch cameras, set the timer, position the phone securely, and tap the shutter.
For selfies, look toward the camera lens rather than your image on the screen. This small change makes your eye direction look more natural.
Portrait mode can work well when there’s enough light and the phone can separate you from the background. Check the preview before starting the timer because the depth effect may not activate when you’re too close or too far away.

Using an Apple Watch as a remote
An Apple Watch can control the iPhone camera without making you run back to the phone after every picture. Open the Camera Remote app on the watch to see a preview, adjust your position, and start the capture.
The watch uses its own short delay and works well for group photographs, tripod shots, and self-portraits. It doesn’t replace a stable support, but it lets you trigger the camera without touching the iPhone.
Third-party camera apps may offer different manual timer controls, longer delays, or interval shooting. Their menus and timer behaviour will vary, so follow the instructions provided in the app rather than expecting the native Camera layout.
Keep Learning
Your next move with the camera
You’ve got the controls. These are the guides I’d hand you next. Each one picks up where the other left off. Written from the same real photo shoots
-
How to Take Better iPhone Photos With Simple Fixes
How to Take Better iPhone Photos With Simple Fixes Most phone photos don’t fail because the camera is…
-
How to Take Better Photos With Your Phone
How to Take Better Photos With Your Phone How to take better photos with your phone starts with…
-
How to Use Android Camera Controls for Better Photos
How to Use Android Camera Controls for Better Photos I’ve found that most beginners don’t need more camera…



RECOMMENDED EDITOR
On1 Photo RAW – For when you outgrow the build in phone editor
The mobile editor I reach for my serious shots. Free 30-day trial
Conclusion
The iPhone camera timer works best when you prepare the photograph before starting the countdown. Set the composition, focus, and exposure, then place the phone on a tripod or stable surface.
A three-second delay helps the phone settle after you tap the shutter. Five seconds works for nearby positioning, while ten seconds gives you enough time to join a group. Use the shortest delay that lets you get ready without rushing.
About Bob Wild
Bob is a fine-art photographer on Vancouver Island and the creator of Phone Photo Guide, and the founder of Who Said Photography. He shares practical mobile photography tips based on real shooting situations, including portraits, natural light, composition, and everyday phone editing.