
How to Take Better iPhone Photos With Simple Fixes

Bob Wild
Fine Art Photographer, Vancouver Island
Founder of Who Said Photography | 20+ years shooting | I try and test every tip on real shoots before it goes on the page
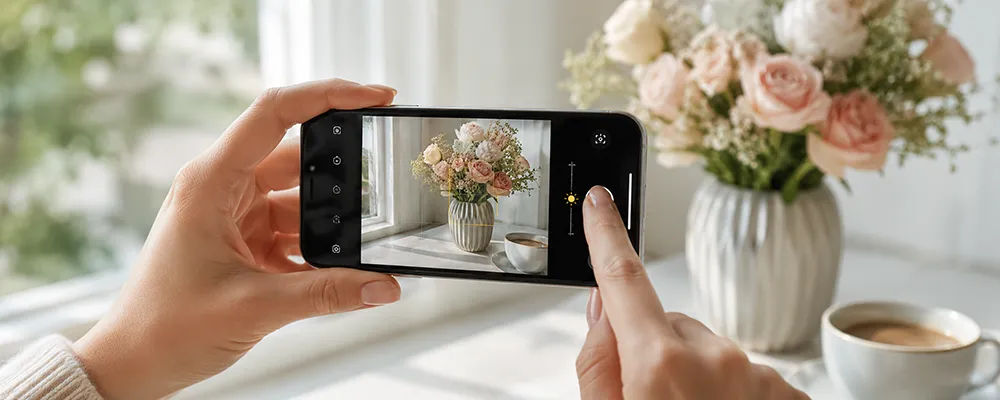
Most phone photos don’t fail because the camera is bad. They usually fail because of something small: a dirty lens, harsh light, a messy background, missed focus, or brightness that’s a little off. I’ve made all of those mistakes. A scene looks good in real life, but the photo comes out soft, flat, or darker than expected. The fix is usually simple: slow down before you press the shutter.
Learning how to take better iPhone photos is mostly about building a few reliable habits: clean the lens, look for better light, pick one clear subject, tap to focus, adjust brightness, and hold the phone steady.
Key Takeaways
Clean the lens before important photos so fingerprints don’t soften the image.
Look for soft natural light because harsh light creates rough shadows and blown highlights.
Choose one clear subject so the viewer knows where to look first.
Tap your subject before shooting so the camera focuses on the right spot.
Adjust brightness before pressing the shutter, especially with windows, skies, or backlighting.
Why should you clean the lens first?
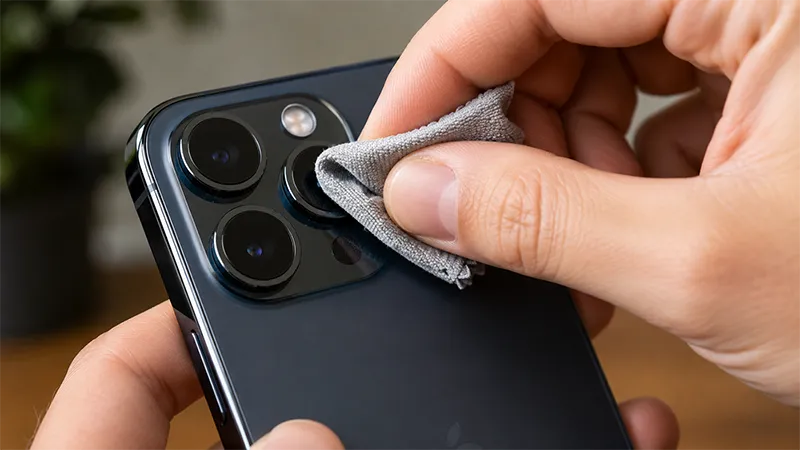
Clean the lens first because fingerprints and pocket lint can make a sharp scene look soft. Your phone is in your hand, pocket, bag, car, or on a table all day. The lens gets smudged fast, and you may not notice until a photo looks dull or hazy.
Give the lens a quick wipe with a microfibre cloth, lens cloth, or a clean part of your shirt.
What light makes phone photos look better?
Soft natural light usually makes phone photos look better because it gives cleaner colour, smoother shadows, and more detail. Bright light isn’t always good light. Harsh midday sun can create dark shadows, shiny skin, blown-out highlights, and squinting faces. Softer light is usually easier for the camera to handle.
For people, look for open shade, window light, or late afternoon light. For food, flowers, pets, products, and small details, move the subject closer to soft light.
If something looks flat, I’ll usually move it before I edit it. Better light solves more problems than most filters.
How do you choose a stronger subject?
Choose one clear subject so the viewer knows where to look first. A strong photo usually has one main idea. It might be a person, a dog, a flower, a coffee cup, a doorway, or someone walking through the frame. When everything competes, nothing stands out.

Before I take the photo, I ask, “What’s this photo really about?” If I can’t answer that, I move closer, change my angle, or leave something out.
|
Problem |
Simple Fix |
|---|---|
|
The photo feels busy |
Move closer |
|
The background distracts |
Shift left or right |
|
The subject feels too small |
Step in before zooming |
|
The photo feels flat |
Find better light |
|
The eye has nowhere to go |
Pick one subject |
Don’t include everything just because it’s there. A simple photo with one clear subject usually works better.
How do you improve composition?
Improve composition by cleaning up the frame before you take the photo.
The phone camera is wide, so it picks up a lot of background. Poles, signs, parked cars, messy tables, bright windows, and random people can slip into the edges.
That’s why I check the edges before I shoot. A small move can make a big difference. Step left, step right, get lower, or move closer.
Look for simple backgrounds, leading lines, reflections, natural frames, and space around the subject. Cropping helps, but it’s better to fix the frame before you take the photo.
Should you move your feet instead of zooming?
Yes, move your feet before you pinch to zoom.
Pinch zoom can make photos look soft, noisy, or over-processed. It feels useful on the screen, but the detail often falls apart later. If you can safely move closer, do that first. Use real lens buttons like 0.5x, 1x, or 2x before pinching. They usually give you a cleaner file.
A sharp wider photo is usually better than a blurry close-up.
How can changing your angle improve a photo?
Changing your angle can make an ordinary subject feel more interesting.
Most phone photos are taken from standing height, which is why many of them look the same. When a scene feels boring, I move before I touch any settings. Crouch down. Shoot from above. Move to the side. Get closer to one detail. Try framing through a doorway, between branches, or along a fence line.
Sometimes the better photo is only two steps away.
How do you keep photos sharp?
Keep photos sharp by holding the phone steady, tapping to focus, and not rushing the shot.
The phone is light, which makes it easy to move without realizing it. That matters indoors, in low light, or when your subject is moving.
Use both hands when you can. Bring your elbows in slightly. If the light is low, lean against a wall, table, fence, or tree. For group photos or night scenes, use the timer so pressing the shutter doesn’t shake the camera. Tap your subject before you shoot. Don’t assume the camera picked the right focus point. This is one of the easiest ways to learn how to take better iPhone photos because it fixes a lot of soft images without advanced settings.

How do you control brightness?
Control brightness by tapping your subject, then dragging the sun icon up or down before you shoot.
The camera usually guesses brightness well, but bright skies, snow, water, sunsets, windows, or a dark subject against a bright background can fool it. Tap the face first. When the focus box appears, drag the little sun icon up to brighten or down to darken. You’ll see the change before taking the photo.
When should you use Portrait mode?
Use Portrait mode when your subject has space behind it and the light is decent.
Portrait mode can look great, but it isn’t perfect. Hair, glasses, fingers, leaves, and detailed edges can confuse it. Sometimes the blur looks natural. Sometimes it looks fake.
Use it for people, pets, flowers, products, and simple objects. After taking the photo, zoom in and check the edges. If the blur cuts into the subject, regular Photo mode may look better.
Which camera settings should beginners check?
Beginners should check a few camera settings, then get back to shooting. Most good photos come from light, focus, exposure, timing, and composition. Still, a few settings make the camera easier to use.
|
Steps |
What To Do |
|---|---|
|
Grid |
Helps keep horizons straight |
|
Preserve Settings |
Keeps your last camera choices |
|
Live Photo |
Helps with blinking and timing |
|
HDR |
Helps with bright and dark areas |
|
Resolution |
Gives more detail when needed |
Turn on the grid first. It doesn’t show in the final photo, but it helps keep horizons and vertical lines cleaner.
How should you edit phone photos?
Edit phone photos lightly so they still look believable.
Editing should improve a good photo, not rescue a careless one. Start with the best photo you can make in camera, then make small adjustments. Straighten tilted horizons. Crop distractions. Lower highlights if the sky is too bright. Lift shadows if the subject is too dark. Add a little contrast. Adjust colour only enough to make the photo feel natural.
If you want how to take better iPhone photos to become a habit, think of editing as the final touch. Most of the work happens before you press the shutter.
How to take better iPhone photos without overthinking it?
Use the same simple routine until it becomes automatic.
- Wipe the lens
- Find soft light
- Pick on main subject
- Check the edges
- Tap to focus
- Adjust brightness
- Hold steady
- Edit lightly
Keep Learning
Your next move with the camera
You’ve got the controls. These are the guides I’d hand you next. Each one picks up where the other left off. Written from the same real photo shoots
-
How to Take Better Photos With Your Phone
How to Take Better Photos With Your Phone How to take better photos with your phone starts with…
-
How to Use Android Camera Controls for Better Photos
How to Use Android Camera Controls for Better Photos I’ve found that most beginners don’t need more camera…
-
How to Use iPhone Burst Mode for Moving Subjects
How to Use iPhone Burst Mode for Moving Subjects A moving subject can change position between the moment…
-
How to Use iPhone Camera: Plain Guide to Camera Controls
How to Use iPhone Camera: Plain Guide to Camera Controls Learning how to use iPhone camera controls starts…





RECOMMENDED EDITOR
On1 Photo RAW – For when you outgrow the build in phone editor
The mobile editor I reach for my serious shots. Free 30-day trial
Conclusion
Better phone photos come from small habits repeated well.
Clean the lens. Find softer light. Choose one subject. Move your feet before you zoom. Tap to focus. Adjust brightness before shooting. Hold steady. Edit with a light touch.
That’s the simple path for how to take better iPhone photos. You’re not trying to use every feature in the Camera app. You’re trying to make one clear decision before each shot.
About Bob Wild
Bob is a fine-art photographer on Vancouver Island and the creator of Phone Photo Guide, and the founder of Who Said Photography. He shares practical mobile photography tips based on real shooting situations, including portraits, natural light, composition, and everyday phone editing.