
AE/AF Lock on iPhone: Keep Focus and Exposure Consistent

Bob Wild
Fine Art Photographer, Vancouver Island
Founder of Who Said Photography | 20+ years shooting | I try and test every tip on real shoots before it goes on the page
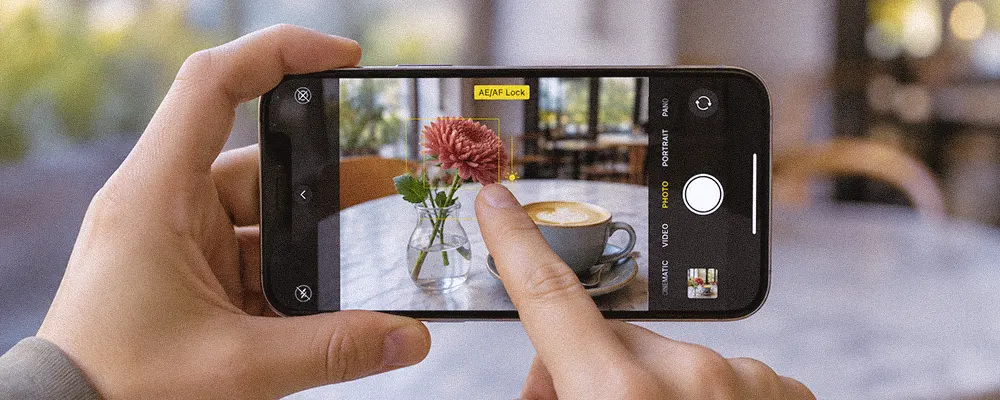
When I’m rushing to capture a photo, my iPhone can change the focus or brightness just as I’m ready to shoot. A face that looked sharp can suddenly turn soft, or a shift in exposure can throw off the whole composition. That’s when I use AE/AF Lock on my iPhone to keep the focus and exposure steady while I fine-tune the framing and take the shot.
Key Takeaways
Hold your subject on-screen to lock focus and exposure for consistent frames.
Check the yellow lock label before recomposing so settings stay fixed.
Adjust the sun slider after locking to correct brightness without changing focus.
Relock when distance or light changes to prevent soft or poorly exposed photos.
Skip the lock for unpredictable movement because fixed focus cannot follow subjects.
What does AE/AF lock do?
AE/AF lock holds the camera’s autofocus and auto exposure at one selected area. AE means auto exposure, which controls how bright the image appears. AF means autofocus, which controls which distance looks sharp.
This matters because the camera app normally keeps evaluating the scene. If you reframe or something bright enters the picture, the phone may change focus or exposure. A lock stops that shift until you release it.
A normal tap selects an area, but the camera can still update its decision. A touch and hold keeps that selection in place.
How do you turn it on?
Turn it on by touching and holding the main subject in the camera viewfinder. Keep your finger still until the yellow AE/AF lock label appears near the top of the screen.
The label matters because a yellow focus box alone doesn’t confirm that the setting is locked. Wait for the words before moving the phone or taking a series of photos.
- Open Camera and choose Photo mode.
- Frame the subject at the distance you plan to shoot.
- Touch and hold the area that must look sharp.
- Wait until the yellow AE/AF lock label appears.
- Recompose the frame, then press the shutter gently.
If the focus box lands on the background, tap the screen to cancel and try again. The lock preserves your selection, even when that selection is wrong.

When should you use it?
Use the lock when the subject distance and lighting will stay steady while your framing changes. It works well for a posed portrait, a product on a table, or a person passing through a spot you’ve already focused on.
This matters because consistent settings make a group of images easier to compare and edit. The phone won’t brighten one frame or refocus on the background simply because you shifted the composition.
The technique also helps with a bright window behind a person. Lock on the face, adjust the brightness, then try a few compositions. Raising exposure for the face can make the window lose detail.
Adjust brightness after locking
AE/AF lock on iPhone doesn’t prevent you from fine-tuning exposure. After the lock appears, place a finger near the yellow focus box and drag the sun control up to brighten the image or down to darken it.
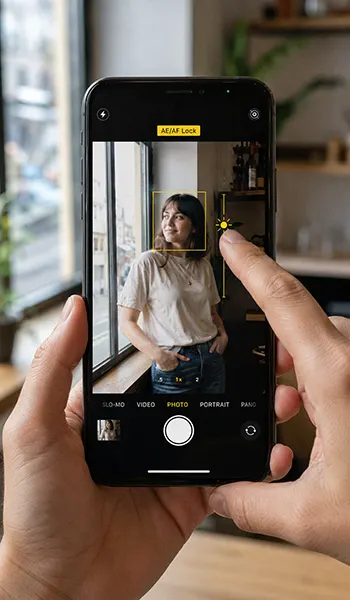
Make a small change, then check both the subject and the brightest part of the frame. A bright face can look washed out, while a dark adjustment can hide detail in hair or clothing. Choose the setting that protects the important detail.
Exposure adjustment doesn’t add light to the scene. In dim conditions, a brighter setting may use a slower shutter speed or more image processing. Hold the phone with two hands, brace your elbows, and ask the subject to stay still.
Choose when to skip it
Leave autofocus active when the subject moves towards or away from you. A locked focus distance doesn’t track the subject, so a child, pet, or cyclist can move outside the sharp zone before you press the shutter.
The lock also becomes unreliable when the light changes. If a person walks from sunlight into shade, the saved exposure may become too bright or too dark. Tap to release it, choose the subject again, and create a new lock.
Use the lock for controlled consistency, not as a cure for every soft photo. It can’t stop camera shake, subject motion, a dirty lens, or digital zoom from reducing detail.
Use it in common scenes
A few simple situations show where the control earns its place:
- For a portrait, lock on the nearest eye before adjusting the composition.
- For a product, lock on the label so repeated angles keep a similar focus.
- For street photos, pre-focus on a spot and shoot as someone enters it.
- For a silhouette, lock on the bright sky to keep the subject dark.
- For food, lock on the main detail instead of the plate edge.
In each case, keep the phone-to-subject distance nearly the same. If you step forward, change lenses, or move the subject, set the lock again.
Know the camera control difference
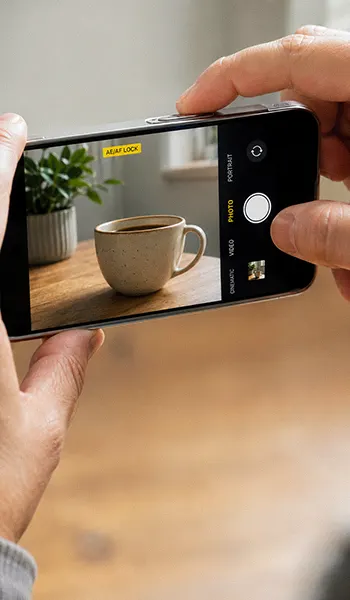
Some supported iPhone models offer another way to lock focus and exposure through Camera Control. Apple’s current guidance says this option must first be enabled in Settings under Camera and Camera Control. You then maintain the lock by keeping light pressure on the control.
That behaviour differs from the standard viewfinder method, which stays locked after you lift your finger and ends when you tap the screen. If your phone lacks camera control, use the touch-and-hold steps above. They’re the clearest starting point for this task.
Menus and physical controls don’t match every model or software version. If a control isn’t present, check the current user guide for your iPhone.
Reset and test your lock
Tap anywhere in the viewfinder to release the standard screen-based lock. The AE/AF Lock label should disappear, and the camera can resume evaluating focus and exposure as the scene changes.
Use this quick test before an important photo:
- Lock on a nearby object and confirm the yellow label.
- Aim slightly towards a brighter or darker area.
- Check that focus and brightness remain steady.
- Tap the screen and confirm the label disappears.
- Set a fresh lock on the real subject.
This routine catches a missed hold before it spoils a useful moment.
Keep Learning
Your next move with the camera
You’ve got the controls. These are the guides I’d hand you next. Each one picks up where the other left off. Written from the same real photo shoots
-
How to Take Better Photos With Your Phone
How to Take Better Photos With Your Phone How to take better photos with your phone starts with…
-
How to Use Android Camera Controls for Better Photos
How to Use Android Camera Controls for Better Photos I’ve found that most beginners don’t need more camera…
-
How to Use iPhone Burst Mode for Moving Subjects
How to Use iPhone Burst Mode for Moving Subjects A moving subject can change position between the moment…




RECOMMENDED EDITOR
On1 Photo RAW – For when you outgrow the build in phone editor
The mobile editor I reach for my serious shots. Free 30-day trial
Conclusion
AE/AF lock on an iPhone is most useful when you want the camera to stop changing its mind. Lock on the important subject, confirm the yellow label, fine-tune brightness, and keep the shooting distance steady. When the subject or light changes, release the lock and set it again.
About Bob Wild
Bob is a fine-art photographer on Vancouver Island and the creator of Phone Photo Guide, and the founder of Who Said Photography. He shares practical mobile photography tips based on real shooting situations, including portraits, natural light, composition, and everyday phone editing.