
How To Adjust Exposure on iPhone Before You Take the Shot

Bob Wild
Fine Art Photographer, Vancouver Island
Founder of Who Said Photography | 20+ years shooting | I try and test every tip on real shoots before it goes on the page
I learned how important it is to adjust exposure on iPhone after taking photos of someone sitting beside a bright window. The person looked fine to my eyes, but the iPhone camera reacted to the light outside and left their face much darker than I expected.
A quick tap on the subject and a small movement of the sun slider can make a big difference. It helps you brighten a face, protect a bright sky, and keep important details from disappearing before you press the shutter button.
Key Takeaways
Tap your subject first so focus and brightness match the important area.
Drag the sun slider gently to protect highlights without making shadows muddy.
Lock exposure for repeated shots so brightness stays consistent between frames.
Use the exposure control when one setting should cover several compositions.
Check bright details before shooting because lost highlights are difficult to recover.
How do you use the sun slider?
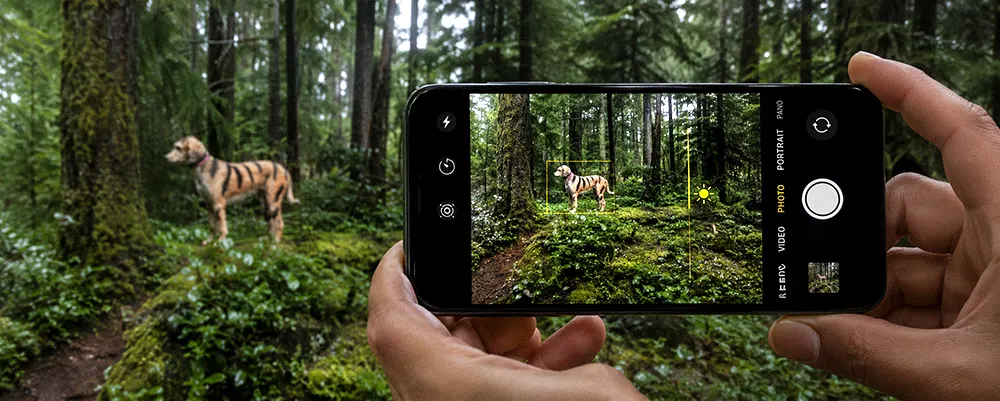
Use the sun slider by tapping the subject, then dragging the sun icon beside the yellow focus box. Drag upward to brighten the preview or down to darken. This is the quickest way to adjust the exposure.
What does the tapping do? It tells the iPhone where to focus and which area should guide exposure. The yellow box marks the focus point. If you tap a dark coat, the camera may brighten the whole scene. If you tap a bright cloud, it may darken the frame and make a landscape harder to see.
Follow this quick method:
- Open the camera and stay in photo mode.
- Frame the shot before changing any controls.
- Tap the main subject to place the yellow focus box.
- Drag the sun icon a small distance up or down.
- Check the subject and the most important detail.
- Press the shutter while the preview looks balanced.
Once the preview looks right, press the shutter button to take the photo without changing your framing.
Start with small movements. Extreme adjustments can muddy shadows or erase bright texture. If the preview looks wrong, tap the screen on the subject and try again.
When should you lock exposure?
Lock exposure when the subject and light stay the same across several photos. Hold the subject until AE/AF lock appears, then adjust the sun slider.
The iPhone camera app reassesses the scene as you adjust your position. A small framing change can bring more sky, wall, or window into view and cause brightness to shift between shots. AE/AF Lock keeps both focus and exposure until you tap the screen again.
Use the lock for a portrait sequence, a product, or several compositions of one scene. It can also help in portrait mode when the person remains in one position. Unlock it when the distance or light changes, especially when photographing a moving subject.
Choose exposure for the important detail.
The best exposure protects the detail that matters. A face should stay readable, while a sunset needs colour and texture in the sky. High-contrast scenes may force a choice between bright and dark detail.
Use this table as a starting point, then judge the live preview:
|
Scene |
Starting Adjustment |
Check Before Shooting |
|---|---|---|
|
Face beside a window |
Tap the face and brighten slightly |
Keep skin natural and watch the window |
|
Sunset or bright sky |
Tap the bright sky and darken slightly |
Keep colour and cloud texture visible |
|
Snow or white subject |
Tap the subject and brighten carefully |
Keep the white surface textured, not grey |
|
Dark indoor scene |
Tap the main subject and brighten a little |
Hold steady and avoid washed-out shadows |
A slider can’t fix poor light. If the face stays dark against the window, turn the person toward the light or choose a softer angle before raising exposure.
Use the separate exposure control.
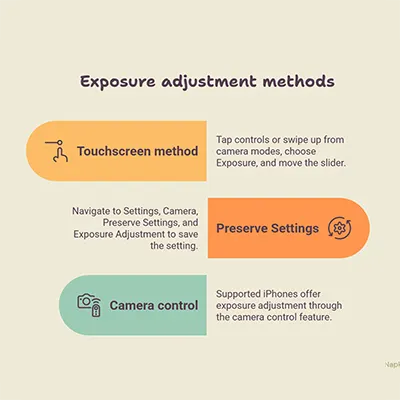
The camera controls menu includes a separate exposure adjustment for future photos. Tap the controls button or swipe up from the camera modes, choose “Exposure,” and move the slider. This setting stays locked until the next time you open the camera.
This is useful when several photos need the same overall correction. For example, a snowy scene may need a modest increase across several frames, while a concert stage may need a decrease to protect spotlit faces. This technique is commonly described as using exposure compensation.
On iPhone 11 and later, Settings > Camera > Preserve Settings > Exposure Adjustment can save the setting.
Supported iPhones also offer exposure through camera control, but the touchscreen method works across more models. Camera settings and menu locations can vary slightly by model and software version.
Avoid common exposure mistakes.
The biggest mistake is making the whole preview bright. White clouds, pale skin, can be pushed too far. Exposure can cause blown-out clouds, pale skin, signs, and lamps to lose their texture.
Avoid these problems when you adjust exposure on iPhone:
- Don’t tap a random dark corner, as the camera may wash out the subject.
- Don’t drag the slider to its limit before testing a smaller correction.
- Don’t confuse a dim display with an underexposed photo outdoors.
- Don’t leave AE/AF Lock active after taking the shot.
Exposure changes overall brightness, not one area. When a scene has bright and dark extremes, a better angle often works better than a larger slider adjustment.
Build a quick exposure routine.
Use the same short routine until this workflow feels natural. Frame the photo, tap the main subject, make one small exposure adjustment, and check the brightest detail you want to keep. Hold the phone steadily, click, then review for the proper exposure.
If the first shot misses, change one thing at a time. Darken slightly when bright detail disappears. Brighten slightly when the subject is too dark. Unlock and refocus whenever the distance changes.
For repeated iPhone photos, decide whether the sun slider is enough or AE/AF lock will prevent unwanted shifts between similar frames.
Keep Learning
Your next move with the camera
You’ve got the controls. These are the guides I’d hand you next. Each one picks up where the other left off. Written from the same real photo shoots
-
How to Take Better Photos With Your Phone
How to Take Better Photos With Your Phone How to take better photos with your phone starts with…
-
How to Use Android Camera Controls for Better Photos
How to Use Android Camera Controls for Better Photos I’ve found that most beginners don’t need more camera…
-
How to Use iPhone Burst Mode for Moving Subjects
How to Use iPhone Burst Mode for Moving Subjects A moving subject can change position between the moment…




RECOMMENDED EDITOR
On1 Photo RAW – For when you outgrow the build in phone editor
The mobile editor I reach for my serious shots. Free 30-day trial
Conclusion:
The fastest way to adjust exposure on an iPhone is to tap the important subject and move the sun slider gently. Protect the detail that matters, lock the setting only when the scene stays consistent, and review the captured photo before moving on.
These simple controls are useful in everyday iPhone photography because they help you correct brightness before the moment is gone.
About Bob Wild
Bob is a fine-art photographer on Vancouver Island and the creator of Phone Photo Guide, and the founder of Who Said Photography. He shares practical mobile photography tips based on real shooting situations, including portraits, natural light, composition, and everyday phone editing.