
Lock Focus and Exposure on Phone: A Simple Guide

Bob Wild
Fine Art Photographer, Vancouver Island
Founder of Who Said Photography | 20+ years shooting | I try and test every tip on real shoots before it goes on the page
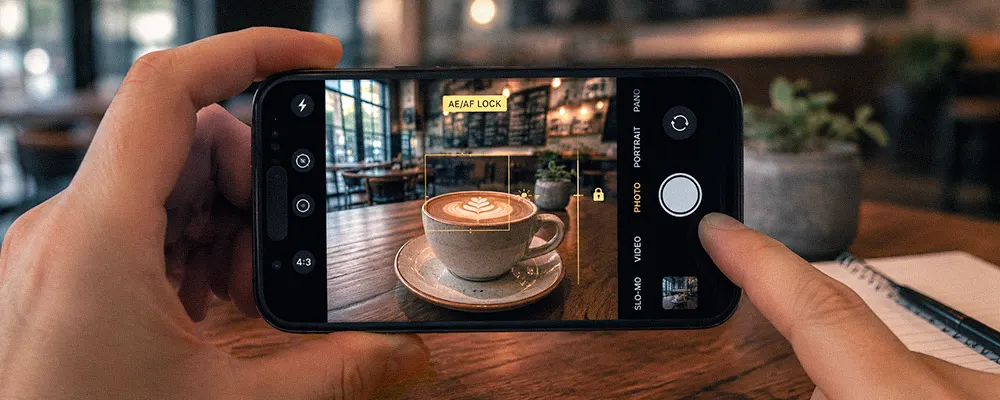
Your phone finds the right subject, then suddenly focuses on the background or changes brightness. That shift can spoil a carefully framed portrait, product photo, or video. Learning to lock focus and exposure on your phone cameras gives you time to compose without the camera changing its mind.
Controls differ across camera apps, but the routine stays simple: choose, lock, adjust, shoot, and reset.
Key Takeaways
Lock the main subject so focus stays steady while you reframe.
Set exposure after focusing to protect important highlights and skin tones.
Check the lock indicator so the camera doesn’t silently readjust.
Release the lock when distance or light changes to avoid mistakes.
Test your camera app first because Android controls differ by model.
Why should you lock focus and exposure?
Lock these settings when automatic adjustments keep changing while you set up your shot.
You have to understand that your phone keeps analyzing the scene. A bright window will darken the photo, while a passerby might pull autofocus away from your subject.
Focus determines which elements in the image appear sharp, while exposure dictates the brightness or darkness of the photo. By locking focus and exposure on phone cameras, you prevent these settings from automatically adjusting to minor changes in framing.
Use the lock to:
- Recompose with a subject near the edge of the frame while maintaining autoexposure settings.
- Take several product photos with a similar look.
- Photograph through glass without focusing on a reflection.
- Hold brightness steady during a short video clip.
- Hold a backlit face at a steady brightness.
How do you lock it on an iPhone?
Touch and hold the important subject until the camera app shows AE/AF lock for auto exposure and focus.
The confirmation matters because a quick tap only selects a temporary focus and exposure point. The camera can continue adjusting when the subject, light, or framing changes, especially with auto exposure.
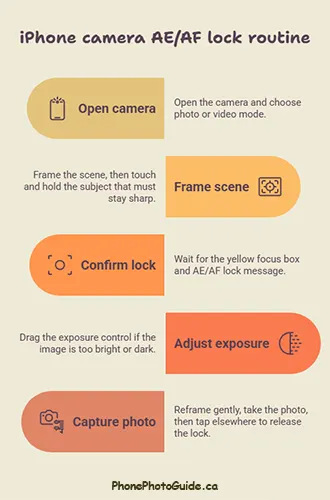
Follow this simple iPhone routine:
- Open the camera and choose photo or video mode.
- Frame the scene, then touch and hold the subject that must stay sharp.
- Wait for the yellow focus box and AE/AF lock message.
- Drag the exposure control if the image is too bright or dark.
- Reframe gently, take the photo, then tap elsewhere to release the lock.
Some supported iPhones also offer a camera control lock. Since availability depends on the model and settings, start with the handy screen gesture feature.

How do you lock it on an iPhone?
Touch and hold the important subject until the camera app shows AE/AF lock for auto exposure and focus.
The confirmation matters because a quick tap only selects a temporary focus and exposure point. The camera can continue adjusting when the subject, light, or framing changes, especially with auto exposure.
Follow this simple iPhone routine:
- Open the camera and choose photo or video mode.
- Frame the scene, then touch and hold the subject that must stay sharp.
- Wait for the yellow focus box and AE/AF lock message.
- Drag the exposure control if the image is too bright or dark.
- Reframe gently, take the photo, then tap elsewhere to release the lock.
Some supported iPhones also offer a camera control lock. Since availability depends on the model and settings, start with the handy screen gesture feature.
|
Phone or App |
Engage the Lock |
Check For |
Release the Button |
|---|---|---|---|
|
iPhone Camera |
Touch and hold the subject |
AE/AF Lock message |
Tap the screen |
|
Google Pixel Camera |
Tap the subject, then tap Lock |
Lock icon or tracking marker |
Tap the lock or reset control to return to default settings. |
|
Samsung Galaxy Camera |
Touch and hold the subject |
AF/AE frame |
Tap another area or reset |
|
Other Android camera |
Try a long press or lock icon |
Padlock, AF/AE label, or message |
Use the shown unlock control |
If nothing appears, try your standard photo mode. Portrait, night, macro, and third-party modes work differently.
Choose the right focus point.
Place the focus point on what you want as important details. Choose the nearer eye in a portrait, a readable label on a product, or a clear landscape subject instead of empty sky.
The lock holds a focus distance, not every object in the frame. You may need to reset it whenever your distance from the subject changes.
Avoid blank walls, clear sky, glare, and low-contrast surfaces. If focus struggles, choose a detailed edge at the same distance, lock, then recompose.
Adjust brightness without losing focus.
After locking, use the exposure slider to set brightness. Check the subject plus bright clouds, lamps, or white clothes. Lower exposure if important bright areas lose detail.
Don’t brighten a dark scene until the phone becomes impossible to hold steadily; use the exposure and focus lock instead. If you can add light or brace the phone, use a tripod when stability is the real problem.
For a silhouette, lock on the bright sky or lower exposure until the subject becomes dark and clearly shaped. Lock onto the face and make adjustments until the skin appears natural for a backlit portrait.
When the lock helps most
A good time to lock focus and exposure on your phone is when the framing stays similar. It works well for food, artwork, products, still portraits or anything that is not moving.
It can also reduce focus hunting and brightness pulsing in videos, enhancing the overall feature. Lock after the subject reaches its mark, keep the distance and lighting steady, then record a test clip.
For a window photo, place the lens close to a clean spot on the glass, focus on the distant subject, and lock. Reflections are then less likely to pull focus forward.
Mistakes that break the shot
The most common mistake is leaving the lock active after the scene changes.
Watch for these problems:
- You move closer or farther after locking focus.
- The subject walks toward or away from the phone camera.
- Sunlight changes, or you turn toward a brighter background.
- You switch lenses, modes, or camera apps, each with its own autofocus capabilities.
- You mistake exposure lock for image stabilization.
Use subject tracking for fast action when available. A fixed lock is ideal for predictable movement or a stationary subject.
Follow a simple routine.
In standard Photo mode, compose loosely, choose the subject, engage the lock, and confirm the indicator. Adjust exposure while watching the brightest, most important area, then refine the frame.
Review one photo at full size. Check subject detail, bright highlights, and dark shadows. Correct the focus point, brightness, or camera position before continuing.
Finally, don’t forget to release the lock so your next photo doesn’t reuse the old setting.
Keep Learning
Your next move with the camera
You’ve got the controls. These are the guides I’d hand you next. Each one picks up where the other left off. Written from the same real photo shoots
-
How to Take Better Photos With Your Phone
How to Take Better Photos With Your Phone How to take better photos with your phone starts with…
-
How to Use Android Camera Controls for Better Photos
How to Use Android Camera Controls for Better Photos I’ve found that most beginners don’t need more camera…
-
How to Use iPhone Burst Mode for Moving Subjects
How to Use iPhone Burst Mode for Moving Subjects A moving subject can change position between the moment…




RECOMMENDED EDITOR
On1 Photo RAW – For when you outgrow the build in phone editor
The mobile editor I reach for my serious shots. Free 30-day trial
Conclusion: Keep focus and exposure under control.
You don’t need a manual camera app. Choose the subject, confirm the lock, adjust brightness, and keep the scene steady. Once you can lock focus and exposure on phone cameras without thinking, repeated shots become easier.
Remember to unlock as soon as the subject distance or light changes to maintain auto exposure. The lock keeps a good setting consistent, but it can’t rescue a setting that no longer matches the scene.
About Bob Wild
Bob is a fine-art photographer on Vancouver Island and the creator of Phone Photo Guide, and the founder of Who Said Photography. He shares practical mobile photography tips based on real shooting situations, including portraits, natural light, composition, and everyday phone editing.