
How to Use iPhone Time-Lapse for Smoother Videos Results

Bob Wild
Fine Art Photographer, Vancouver Island
Founder of Who Said Photography | 20+ years shooting | I try and test every tip on real shoots before it goes on the page
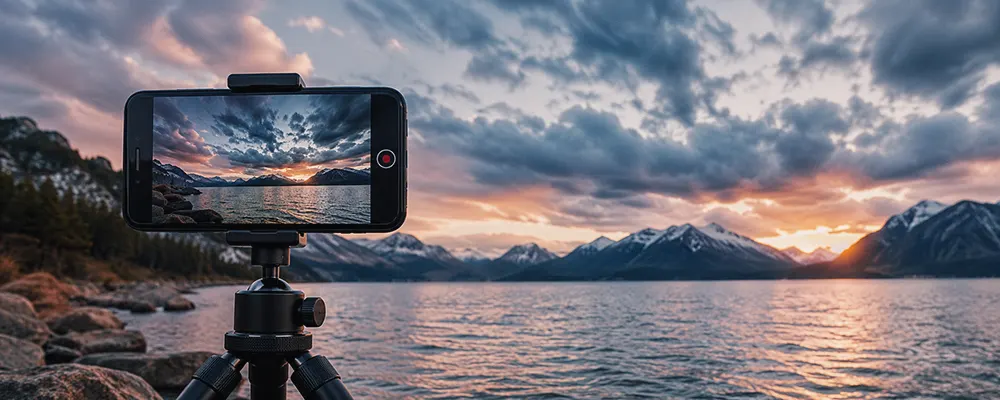
I love making iPhone time-lapse videos; they are so much fun. A cloudy sky, busy street, or sunset looks so much cooler when you speed up the movement and see the change happen in a few seconds. However, I’ve also discovered that if the phone shifts even slightly, it can ruin the scene, resulting in a shaky final clip. This guide explains how I record a time lapse that feels steady, clear, and worth watching.
Key Takeaways
Mount your iPhone securely so the finished time-lapse stays calm and watchable.
Choose visible, steady change so every recorded minute adds useful movement.
Frame before recording because later camera adjustments create distracting jumps.
Record a short test first to catch glare, shake, and poor composition.
Protect the phone from traffic, weather, and heat during longer recordings.
How do you start an iPhone time-lapse?
Open the Camera app, swipe to Time-lapse, frame the scene, and tap the red Record button. Let the action develop, then tap the button again to stop. The finished video appears in Photos, where you can watch, trim, or edit the clip.
This setup matters because the built-in mode handles the capture interval and playback speed. Your job is to choose a changing scene, compose it well, and prevent movement. Apple’s current iPhone camera instructions recommend using a stable surface or tripod.
Use this quick setup:
- Decide where the finished video will appear, then choose landscape or portrait orientation.
- Place the iPhone on a tripod, clamp, or solid surface.
- Frame a fixed object with the moving subject around or behind it.
- Record a short test and play it back before starting the main take.
Avoid pinching, panning, or moving the support after recording begins. Small changes become fast jumps during playback.

How long should you keep recording?
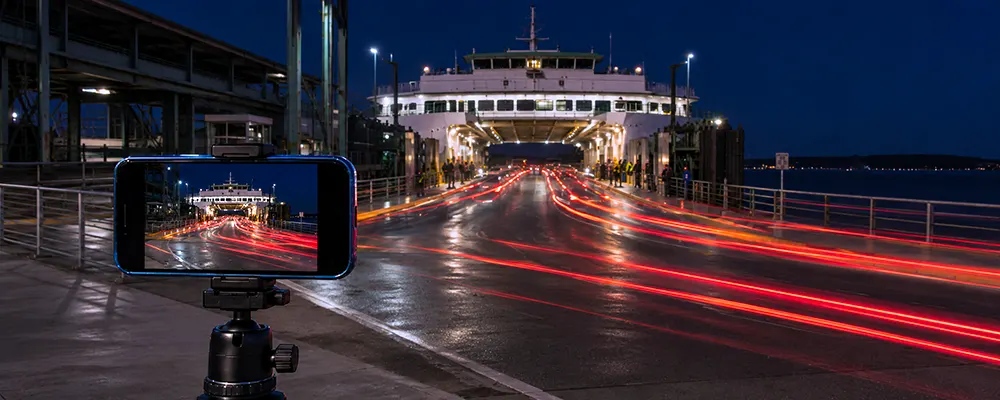
Record until the scene has completed a clear change, not for one fixed number of minutes. Clouds need time to cross the frame, traffic needs several movement cycles, and a sunset needs enough time for colour and brightness to shift.
This process matters because the iPhone selects frames throughout the recording and plays them as a short, sped-up video. A longer recording does not translate minute for minute into a longer finished clip. Judge the take by the amount of visible change, not by the clock alone.
Start with a short test, then watch the scene. Stop after the action has formed a beginning, middle, and end. For clouds, that may mean waiting for a group to enter and leave the frame. For traffic, capture several light changes. For a sunset, begin before the best colour and continue until the scene has clearly faded.
Longer time-lapses will use more battery and storage. Before leaving the camera to run, check that the phone has enough free space and power to complete the recording.
How do you keep it steady?
Put the iPhone on a tripod or a solid surface and leave it untouched while it records. A clamp can help when a flat surface does not give you the angle you need.
Stability matters because time-lapse speeds up every bump. Hand holding creates drifting edges and sudden shakes, even if the live view seems calm. Apple recommends a tripod on iPhone 12 or later when recording time-lapse in low light for more detail and brightness.
Before pressing Record, check that the mount cannot slip. Keep tripod legs away from foot traffic, avoid railings that vibrate, and shield the setup from wind. If you tap the screen, wait for movement to settle before the action begins
Choose scenes with visible change
A successful iPhone time-lapse shows change against a subject that stays still. A skyline gives moving clouds a clear reference. Buildings and road markings reveal traffic flow. A tree, roof-line, or shoreline makes fading sunset light easier to see.
Look through the entire frame before recording. Moving branches at the edge may become a quick distraction. Bright signs can pull attention away from traffic, while a large empty sky can make small clouds feel slow. Move the phone before the take, not during it.
|
Subject |
What To Show |
Recording Approach |
Main Caution |
|---|---|---|---|
|
Clouds |
Movement across a fixed skyline |
Wait for clouds to cross much of the frame |
Wind can shake a light tripod |
|
Traffic |
Repeating flow through a clear intersection |
Capture several light or traffic cycles |
Stay in a protected, legal position |
|
Sunset |
Colour and brightness changing around a foreground |
Begin early and continue past peak colour |
Watch for glare and rapid exposure shifts |
Plan for light and power
Time-lapse sessions can run long enough for light, weather, battery level, and phone temperature to change. Check these conditions before you leave the camera alone.
For a sunset, keep the sun from dominating the frame. Include land, buildings, or trees so the changing light has context. In low light, a tripod is more dependable than a ledge that can be bumped. Don’t cover the phone with fabric to block stray light because that can trap heat.
The built-in Camera app controls exposure automatically. Watch for sudden brightness changes caused by vehicle headlights, signs, or the sun moving behind clouds.
Charge the battery before a longer recording. If you use external power, plug the phone in first and secure the cable so it cannot pull the mount or create a trip hazard. Confirm that the lens is dry, the phone has free storage, and rain or direct heat will not threaten the device.
Avoid these common mistakes
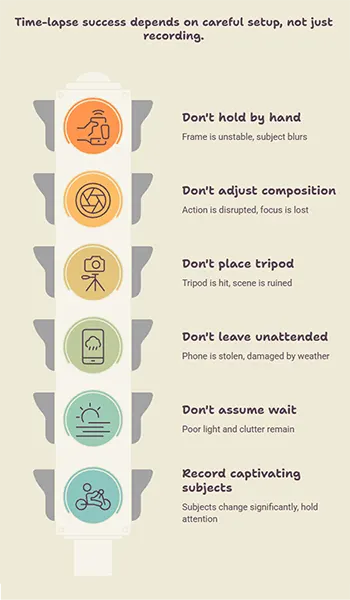
Most failed time-lapses come from setup choices rather than the record button. Check for these problems before committing to the scene:
-
Don’t hold the phone by hand when the frame should remain fixed.
-
Record subjects that change significantly or last long enough to be captivating.
-
Don’t adjust the composition once the main action has started.
-
Don’t place a tripod where pedestrians, cyclists, or drivers could hit it.
-
Don’t leave the phone unattended where weather, theft, or heat is a risk.
-
Don’t assume a long wait will rescue poor light or a cluttered frame.
If the test clip feels confusing, simplify the composition. Choose one clear moving subject and one stable visual anchor.
Use a simple recording routine
A repeatable routine makes iPhone time-lapse recording easier. Choose the change, find a safe location, build a steady frame, and run a brief test. Check playback for shake, glare, blocked movement, and distracting edges.
Once the test works, start the main recording and leave the setup alone. Watch the real event rather than the timer. Stop when the change has reached a natural ending, then review the footage before packing up.
If the clip feels too abrupt, record the next attempt earlier and let the action travel farther through the frame.
Keep Learning
Your next move with the camera
You’ve got the controls. These are the guides I’d hand you next. Each one picks up where the other left off. Written from the same real photo shoots
-
How to Take Better iPhone Photos With Simple Fixes
How to Take Better iPhone Photos With Simple Fixes Most phone photos don’t fail because the camera is…
-
How to Take Better Photos With Your Phone
How to Take Better Photos With Your Phone How to take better photos with your phone starts with…
-
How to Use Android Camera Controls for Better Photos
How to Use Android Camera Controls for Better Photos I’ve found that most beginners don’t need more camera…




RECOMMENDED EDITOR
On1 Photo RAW – For when you outgrow the build in phone editor
The mobile editor I reach for my serious shots. Free 30-day trial
Conclusion: Make movement tell the story
The best results begin with a changing subject and a phone that does not move. Use a stable support, show motion against a fixed reference, and record long enough for the scene to develop. Test first, protect the setup, and let the event create the pace.
About Bob Wild
Bob is a fine-art photographer on Vancouver Island and the creator of Phone Photo Guide, and the founder of Who Said Photography. He shares practical mobile photography tips based on real shooting situations, including portraits, natural light, composition, and everyday phone editing.