
Use iPhone Grid for Better Photo Composition: Easy Tips

Bob Wild
Fine Art Photographer, Vancouver Island
Founder of Who Said Photography | 20+ years shooting | I try and test every tip on real shoots before it goes on the page
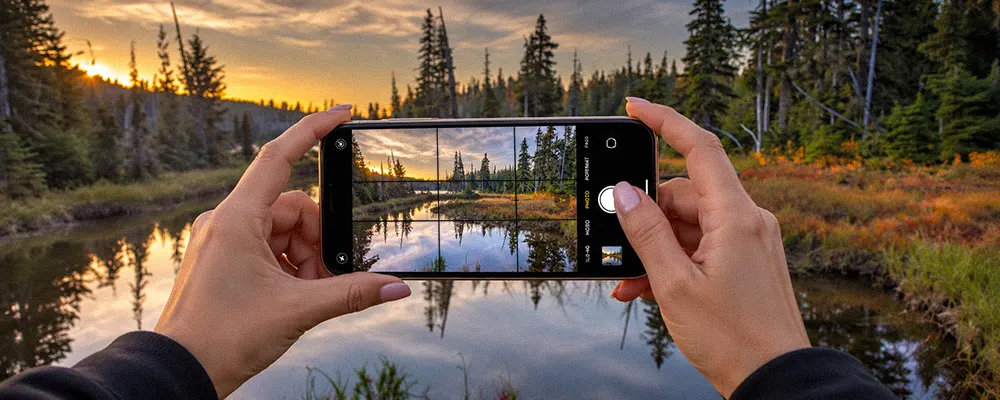
I use iPhone grid lines whenever I want a little extra help composing my shot. I’ve taken plenty of photos where the subject was sharp and the light looked great, but the photo was still off. Maybe the horizon was slightly crooked, the subject was awkwardly placed, or I missed a distracting object at the edge of the frame.
The grid gives me a visual reference on where to place my subject, balance the scene, and catch those little composition problems before I press the button.
Key Takeaways
Turn on Grid so framing and alignment become easier.
Place important details near intersections to create a clear visual focus.
Align horizons with horizontal lines so landscapes feel deliberate and balanced.
Leave space ahead of people or animals so movement feels natural.
Try centred framing for symmetry when third-based placement weakens the scene.
How does the grid improve composition?
The grid improves composition by giving you clear reference lines for subject placement, horizons, and space. Instead of guessing where an object sits, you can compare it with a horizontal line or intersection.
Small framing changes can make the main subject easier to find for the viewer. Moving a face away from the centre, lowering a busy horizon, or trimming a bright edge gives the photo a clearer purpose.
Start where the lines intersect. These intersections are useful spots for a face, flower, or building detail. You don’t need perfect alignment. A nearby placement is often enough.
Where should you place your subject?
Place your subject near a vertical line or intersection when an off-centre frame supports the scene. Put the most important detail, such as a person’s nearer eye, close to an upper intersection when it feels natural.
Subject placement controls how the viewer moves through the image. Space beside the subject can show location, suggest motion, or keep a portrait from feeling cramped.
For a person looking sideways, leave more room in front of their face than behind. For a walking person, cyclist, or pet, leave room in the direction of travel. That open area provides the subject somewhere to look or move within the frame.
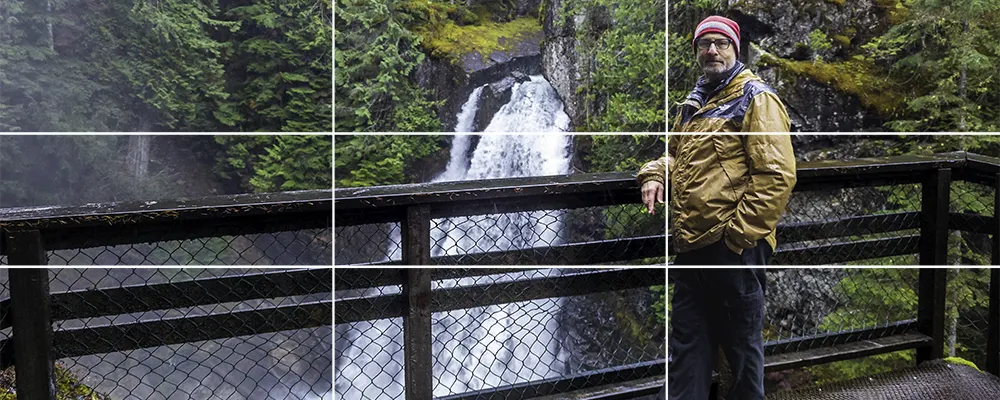

Keep horizons straight with both tools.
Use a horizontal grid line to choose where the horizon belongs, then use Level to check whether the phone is straight. The tools solve related but different problems.
Place the horizon near the lower line when the sky is the most intriguing part. Use the upper line when the foreground has stronger colour, texture, reflections, or leading lines. Avoid putting the horizon through a person’s head simply to match a third.
Grid lines can reveal a tilted horizon, but they don’t confirm every kind of alignment. iPhone-level functions is more useful when you want the camera parallel to the ground or square to a wall.
Buildings may still appear to lean when you tilt the phone upward because of perspective
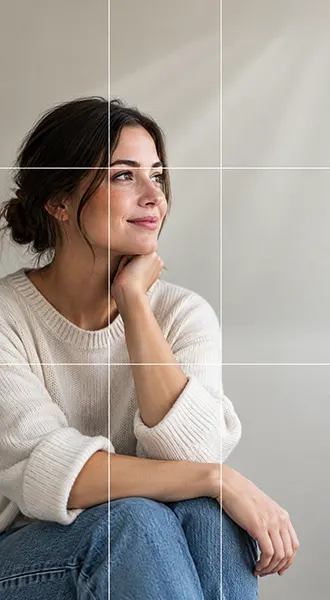
Compose portraits with room to look.
For a simple portrait, place the eyes near the upper horizontal line and keep enough space around the face. The exact position depends on the crop, pose, and background.
Watch the edges before shooting. Avoid cutting through wrists or ankles, and check whether an object seems to grow from the person’s head. A small step often cleans the frame.
Don’t force every face onto an intersection. A direct portrait with even light and a simple background can look stronger in the centre. The grid still helps by showing whether the head, shoulders, and surrounding space are balanced.
Use the grid for different scenes.
The same grid can solve different problems depending on what you photograph. Choose one clear job instead of trying to align every object at once.
|
Scene |
Useful Grid Placement |
What To Check |
|---|---|---|
|
Landscape |
Horizon on the upper or lower line |
Give more space to the stronger half |
|
Portrait |
Eyes near the upper line |
Leave room in the direction of the gaze |
|
Building |
Main edge near a vertical line |
Check Level and watch for perspective lean |
|
Food |
Plate or feature near an intersection |
Remove bright clutter around the edges |
|
Street scene |
Subject on one third |
Use paths or shadows to lead toward them |
Know when centred framing works better.
Centred framing works well when the scene depends on symmetry, repetition, or a direct connection with the subject. Reflections, doorways, roads, close details, and straight-on portraits are good cases to test.
Use the middle box to check equal space on both sides. For a doorway or corridor, line up the centre so repeated shapes don’t feel uneven.
Treat the rule of thirds as a starting point, not a scorecard. Take one centred version and one off-centre version when the scene is still. Compare them later and ask which arrangement makes the subject clearer.
Build a simple grid practice routine.
Pick one still subject and take three photos: centred, on the left third, and on the right third. Keep the light, distance, and zoom setting the same.
Compare them full screen. Notice where your eye goes first and whether the empty space helps. Repeat with a landscape, placing the horizon high, low, and centred. After a few sessions, you’ll know when the grid supports the picture.
Keep Learning
Your next move with the camera
You’ve got the controls. These are the guides I’d hand you next. Each one picks up where the other left off. Written from the same real photo shoots
-
How to Take Better Photos With Your Phone
How to Take Better Photos With Your Phone How to take better photos with your phone starts with…
-
How to Use Android Camera Controls for Better Photos
How to Use Android Camera Controls for Better Photos I’ve found that most beginners don’t need more camera…
-
How to Use iPhone Burst Mode for Moving Subjects
How to Use iPhone Burst Mode for Moving Subjects A moving subject can change position between the moment…




RECOMMENDED EDITOR
On1 Photo RAW – For when you outgrow the build in phone editor
The mobile editor I reach for my serious shots. Free 30-day trial
Conclusion: Make the grid part of the shooting.
The best way to use iPhone grid guides is to give them one job at a time. Place the subject, straighten the horizon, or check the edges, then decide whether the frame says what you want.
Keep Grid and Level turned on while you practice. Use the lines as helpful references, but choose centred or off-centre framing based on the subject and story before you.
About Bob Wild
Bob is a fine-art photographer on Vancouver Island and the creator of Phone Photo Guide, and the founder of Who Said Photography. He shares practical mobile photography tips based on real shooting situations, including portraits, natural light, composition, and everyday phone editing.