
Photos in Fog With Phone: Mist Photography Tips That Work

Bob Wild
Fine Art Photographer, Vancouver Island
Founder of Who Said Photography | 20+ years shooting | I try and test every tip on real shoots before it goes on the page

Living on Vancouver Island, I’m no stranger to fog. Some mornings, the mist hangs over the water, while other times it settles deep into the forests. Taking photos in the fog with your phone isn’t always as straightforward as it seems.
I’ve noticed that a scene often looks better to my eyes than what the phone has captured. Low contrast, soft details, and tricky exposure sometimes leave the photo looking flat or grey.
Over time, I’ve learned to keep things simple. Find a strong subject, adjust the exposure, and let the fog create the depth and atmosphere.
Key Takeaways
Use a clear foreground subject to add depth and visual interest.
Adjust your exposure carefully to keep the fog white, not a dull grey.
Focus on a defined edge when autofocus struggles in foggy conditions.
Keep your phone steady when low light requires slower shutter speeds.
Clean your lens regularly and watch your footing in poor visibility.
Why do fog photos look flat?
Fog scatters light and reduces contrast. Distant trees, buildings, and hills lose detail, while nearby objects appear sharper and darker.
Instead of trying to make everything sharp, use these differences to create depth. A tree, person, or fence in the foreground provides the viewer a focal point.
Leave some negative space around your subject. Fog transforms a busy landscape into a simpler scene, creating the soft, ethereal atmosphere that makes misty photography appealing.
How should you adjust exposure in fog?
Bright fog often tricks your phone’s automatic exposure into making white fog look grey. A small exposure increase usually restores its natural brightness.
On an iPhone, tap the subject and drag the exposure control. Touch and hold to activate AE/AF Lock. Some Galaxy phones offer similar adjustments, although controls vary by model.
Take three photos with slightly different exposures. Keep the one that preserves the mood without losing highlight detail.
For darker scenes or silhouettes, lower exposure slightly to retain deep shadows.

Where should you focus when photographing in fog?
Autofocus struggles when fog removes the contrast it needs to detect edges. Tapping an empty patch of mist often leaves your entire photo blurry.
Instead, focus on a tree trunk, person, sign, or another defined subject. Wait for the focus indicator before taking the photo.
If autofocus continues to search, switch to manual focus if your camera app supports it. Remember that distant objects naturally appear softer through thick fog.
|
Preview problem |
Likely cause |
First fix |
|---|---|---|
|
Fog looks dull grey |
Automatic exposure is too dark |
Raise exposure a small amount |
|
Scene loses its mood |
Shadows were brightened too much |
Lower exposure and protect highlights |
|
Nothing looks sharp |
Focus landed in low-contrast fog |
Tap a nearby edge or subject |
|
Frame feels empty |
There is no visual anchor |
Add one clear foreground shape |
Create depth in foggy landscapes
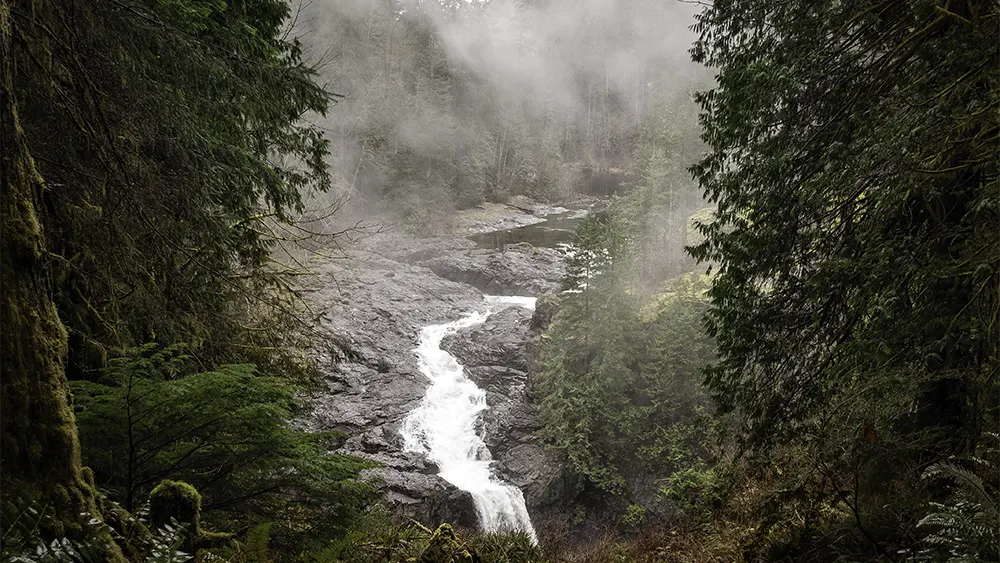
Fog naturally separates objects into layers. A foggy forest, winding path, or shoreline creates a strong sense of depth as distant details disappear.
Start with your phone’s main 1x lens, especially in low light. A telephoto lens helps compress layers of trees or hills, while a wide-angle lens works well with an intriguing foreground.
Avoid excessive digital zoom, which enlarges details already softened by the fog.
Look for silhouettes against brighter mist. A lone tree, person, or boat becomes a striking subject when surrounded by negative space.
Keep your phone steady and dry.
Foggy conditions typically result in reduced available light.
Your phone sometimes chooses a slower shutter speed automatically, increasing the chance of camera shake. Hold it with both hands, brace against something solid, or use a small tripod.
Check your lens regularly. Why? Tiny water droplets cause blur and flare, so keep a clean microfibre cloth handy.
Poor visibility also makes roads, trails, and shorelines harder to navigate. Choose a safe location and avoid standing near traffic. The National Weather Service fog guidance explains the risks.

Use a simple fog photography routine.
Good fog photography doesn’t require complicated camera settings. Follow this routine whenever you take photos:
- Clean your lens and find a safe shooting position.
- Choose one clear foreground subject.
- Move until important shapes don’t overlap.
- Tap your subject to set focus and exposure.
- Adjust brightness to preserve the atmosphere.
- Keep the camera steady and take several exposures.
- Please review your results before proceeding.
To find fog, check the weather forecast and local visibility reports. Early mornings around lakes, shorelines, valleys, and forested areas often offer promising conditions.
Go out early when conditions look favourable. Fog changes quickly, especially when the sunlight starts breaking through.
Edit fog photos without losing the atmosphere.
The goal of post-processing is to improve your photo without removing the fog’s natural softness.
Start with exposure and white balance. Adjust contrast gently until your subject stands out, but avoid making distant details unnaturally sharp.
Use dehaze sparingly. Too much introduces noise, harsh edges, and unwanted halos.
Keep saturation modest to preserve the quiet, moody colours. Black-and-white editing also works well when shapes and silhouettes are stronger than colours.
Compare your edit with the original. The fog should still look like fog.
Keep Learning
Your next move with the camera
You’ve got the controls. These are the guides I’d hand you next. Each one picks up where the other left off. Written from the same real photo shoots
-
Common Mistakes Mobile Photographers Make for Beginners
Common Mistakes Mobile Photographers Make: Beginners Guide Common mistakes mobile photographers make often has less to do with…
-
Flower Photos With Phone: Beautiful Flower Photography Tips
Flower Photos With Phone: Beautiful Flower Photography Tips Flower photos with phone can turn out wonderful, but have…
-
How To Adjust Exposure on iPhone Before You Take the Shot
How To Adjust Exposure on iPhone Before You Take the Shot I learned how important it is to…


RECOMMENDED EDITOR
On1 Photo RAW – For when you outgrow the build in phone editor
The mobile editor I reach for my serious shots. Free 30-day trial
Conclusion: Choose atmosphere over perfect detail
Good fog photos don’t need perfect sharpness. Strong subjects, careful exposure, and natural layers are often enough to create an interesting photograph.
Keep the composition simple, let distant details fade, and use the fog to add atmosphere rather than fighting against it.
About Bob Wild
Bob is a fine-art photographer on Vancouver Island and the creator of Phone Photo Guide, and the founder of Who Said Photography. He shares practical mobile photography tips based on real shooting situations, including portraits, natural light, composition, and everyday phone editing.