
Moon Photos With Phone: Simple Steps for Clearer Detail

Bob Wild
Fine Art Photographer, Vancouver Island
Founder of Who Said Photography | 20+ years shooting | I try and test every tip on real shoots before it goes on the page
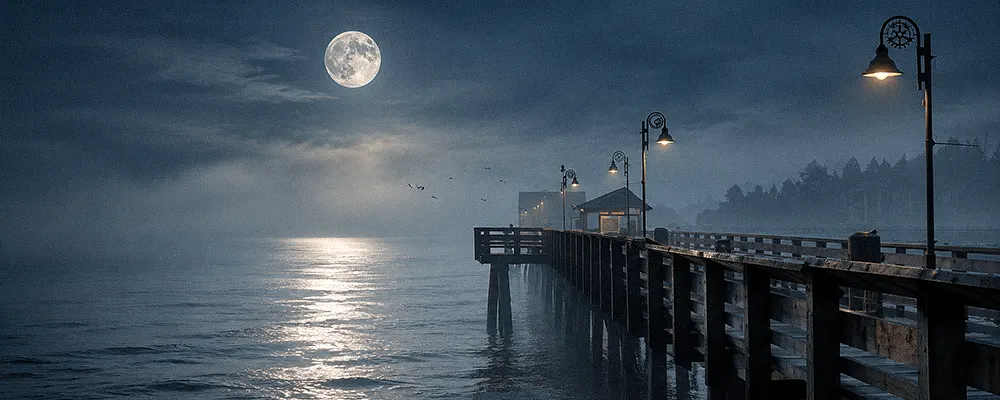
When I first started taking moon photos with my phone, I thought it would be simple. After all, the moon is big and bright in the night sky, so how hard could it be to photograph? Well, my first few attempts were disappointing. Instead of capturing the craters and surface details, I ended up with a blurry white circle surrounded by blackness.
I soon realized that photographing the moon with a smartphone takes a little more care than pointing the camera and pressing the shutter. Getting the focus right, adjusting the brightness, and knowing when to use zoom makes a difference.
The good news is that you don’t need expensive equipment to get a decent moon shot. With a few simple adjustments and a steady hand, you can capture the rich details using the phone you already have.
Key Takeaways
Clean the lens first so fingerprints don’t soften fine lunar detail.
Support the phone firmly, as 4x zoom makes those small movements easier to see.
Lower exposure until the moon looks grey and surface texture appears.
Choose optical zoom when available to preserve more useful image detail.
Take several frames because focus, shake, and atmospheric shimmer can change.
Why does the moon look white and blurry?
Usually, when the moon appears white and blurry, the phone is trying to set the exposure for the dark sky and not the bright surface of the moon. On the other side of the coin, too much light washes out detail, while blur, missed focus, haze and digital zoom soften the edges.
A longer exposure isn’t always the answer; the moon is moving in the night sky; therefore, a long exposure will be blurry from the movement. Reduce exposure first instead of brightening the frame.
Also turn off the flash. It can’t light the moon and may cause reflections from nearby glass, mist, or dust. Clean the lens because a fingerprint can create glow around a bright subject.
Which phone camera settings work best?
Start with the normal photo mode in your camera app, choose a telephoto lens if available, lower exposure, and use a timer. This basic approach works with an iPhone or Android phone. Reduce automatic night features if they brighten the sky and erase moon detail.
Camera controls differ by model. A setting that helps dim stars may hurt a bright moon, so judge the preview by the lunar surface rather than the sky.
Try these controls in this order:
- Select an optical telephoto button if your phone has one.
- Tap the moon to place focus and exposure on it.
- Drag the exposure or brightness control down until texture appears.
- Turn off the flash and reduce night mode only if the moon stays white.
- Set a short timer to prevent movement when you press the shutter.
On an iPhone, tap the moon, drag the sun symbol down, and hold the focus area for AE/AF Lock when needed. Google Pixel and Samsung Galaxy controls vary, so look for brightness, exposure, far focus, or Pro controls. Some Samsung Galaxy smartphones also use AI-assisted Scene Optimizer processing on recognized moon photos.
How should you focus and expose?
Focus directly on the moon, then lower exposure until you can see grey areas or crater texture in the preview. If the focus continues to hunt, use focus lock or a far-focus option if your smartphone provides one.
Dark skies provide minimal information for your phone’s autofocus system. By locking the moon as the subject, you’re telling the phone that the moon’s brightness takes priority over the surrounding darkness. This ensures that the camera focuses on the moon rather than the dark sky.
Make small exposure changes and pause for the preview to update. Stop when bright areas maintain detail.
If your phone offers manual controls, try a faster shutter speed and low ISO for the bright moon, then adjust while checking the preview.
Build a steadier shooting setup
Magnification (zooming in) enlarges every movement. A tiny handshake that goes unnoticed at 1x can smear the moon when you use your smartphone’s telephoto lens.
Use a small tripod and clamp when possible. If you want to take pictures of the moon using your phone without a tripod, rest it on something solid. Otherwise, brace the phone against a wall, railing, tree, bag, or other solid support that doesn’t vibrate.
Set a short timer after framing the moon. A remote shutter or watch control can also prevent movement. Take several photos because the sharpest frame may come during calmer air.
Use timing and composition wisely.
Twilight and dawn are often the best times for astrophotography, when the sky is closer to the moon’s brightness. The phone has less contrast to manage, and the remaining colour adds context.
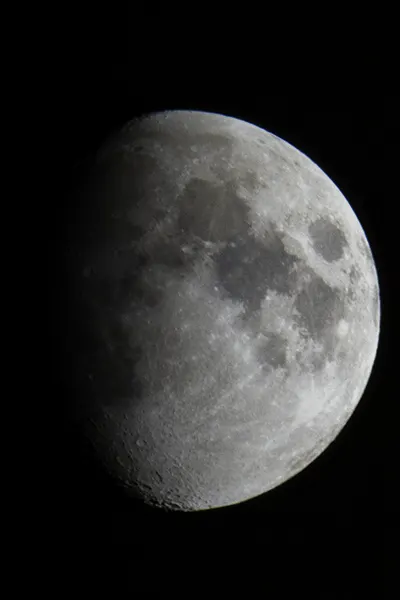
A quarter or crescent moon can show stronger shadows along the line between light and dark. Those shadows often reveal more texture than a full moon.
Place the moon near a tree, roof line, tower, or distant hill to show scale. If you want to photograph the moon with your phone and show its place in the scene, leave room for the surroundings. If you expose for the moon, a foreground silhouette often looks more natural than forcing both areas to be bright.
Fix common moon photo problems.
Use the preview and a magnified review of each frame to diagnose the result. Change one thing at a time so you know which adjustment helped.
|
Problem |
Likely cause |
Best next step |
|---|---|---|
|
White circle with no detail |
Exposure is too bright |
Tap the moon and lower exposure |
|
Soft or doubled edges |
Phone moved during capture |
Add support and use a short timer |
|
Blocky, painted texture |
Digital zoom or processing is too strong |
Reduce zoom and crop the cleaner frame |
|
Glow or strange colour |
Dirty lens, haze, cloud, or nearby light |
Clean the lens and change position |
If every frame stays soft, try again when the moon is higher and the air is clearer. Heat from roof tops, thin clouds, and humidity can blur detail even when the phone is steady as a rock.
Choose your best shot before editing. A sharp image of the moon gives you more to work with than an overprocessed frame. Crop carefully, lower highlights, and add only a little contrast or sharpness.
Stop if the moon looks pixelated or develops a sharp halo. On supported Galaxy phones, you can turn off Scene Optimizer when you want a less enhanced result.
Keep Learning
Your next move with the camera
You’ve got the controls. These are the guides I’d hand you next. Each one picks up where the other left off. Written from the same real photo shoots
-
Common Mistakes Mobile Photographers Make for Beginners
Common Mistakes Mobile Photographers Make: Beginners Guide Common mistakes mobile photographers make often has less to do with…
-
Flower Photos With Phone: Beautiful Flower Photography Tips
Flower Photos With Phone: Beautiful Flower Photography Tips Flower photos with phone can turn out wonderful, but have…
-
How To Adjust Exposure on iPhone Before You Take the Shot
How To Adjust Exposure on iPhone Before You Take the Shot I learned how important it is to…


RECOMMENDED EDITOR
On1 Photo RAW – For when you outgrow the build in phone editor
The mobile editor I reach for my serious shots. Free 30-day trial
Conclusion: Keep your next moon shot simple
The most reliable routine for moon photos with phone is simple: support the phone, focus on the moon, lower exposure, use optical zoom, and take several frames. Start at twilight if night shots keep failing. A well-exposed moon in a strong composition usually looks better than an over-zoomed white blob.
This is the conclusion AKA the end
About Bob Wild
Bob is a fine-art photographer on Vancouver Island and the creator of Phone Photo Guide, and the founder of Who Said Photography. He shares practical mobile photography tips based on real shooting situations, including portraits, natural light, composition, and everyday phone editing.