
Reflections in Phone Photography: How To Shape The Shot

Bob Wild
Fine Art Photographer, Vancouver Island
Founder of Who Said Photography | 20+ years shooting | I try and test every tip on real shoots before it goes on the page

When it comes to reflections in phone photography, most of us probably think about puddles on the road, but I’ve got a secret: “I love photographing storefronts. They’re just so much fun!” A shop window can reflect buildings, people, signs, traffic, or a colourful sky, and changing where you stand can completely change the photo.
The tricky part is getting the reflection to look as good in the photo. A clear reflection can look pale, crooked, or cluttered. The phone could auto-expose for the bright sky, focus on the wrong surface, or pull unwanted background into the shot. I’ve found that this style of photography gets easier when I treat the reflection as part of the subject rather than something happening in the background.
Key Takeaways
Move the phone in small steps because each angle reveals a different reflection.
Lower the lens near puddles so the reflected subject fills more space.
Tap the reflected subject and reduce brightness to protect important highlight detail.
Choose symmetry or an off-centre frame based on what supports the subject.
Check every edge before shooting so clutter doesn’t weaken the reflection.
What makes a reflection worth photographing?
A reflection is worth photographing when it adds shape, balance, context, or surprise. In reflection photography, a beautiful result usually starts with a clear element such as a face, building, tree, sign, or patch of colourful sky. Golden hour can add warm colour, but the reflected subject still needs a clear purpose.
This matters because a reflection that adds nothing becomes clutter. Before opening the camera, ask what the second image contributes. A strong reflection photo should make that second image feel intentional. It might repeat the subject, reveal something outside the frame, or break a familiar scene into an abstract pattern.
Try puddles, calm water, mirrors, windows, polished metal, wet pavement, and glossy tables. A shiny car panel can also work when the vehicle is safely parked and you can keep clear of traffic. At a new location, scan several surfaces before choosing one. Clean the phone lens first. Remove a distracting surface mark only when it’s safe.
How does camera position change reflections?
Camera position changes, which part of the scene appears in the reflection. The technique is simple: move left, right, higher, and lower while watching the reflected subject, not just the surface itself.
This matters because a small change in height can reveal or remove a building in a puddle. Lower the phone until the reflection grows. Bring the lens close to the surface, or turn the phone upside down to place the lens closer, but keep it dry and secure.
For windows and mirrors, move sideways to keep yourself out. Watch the background shift, then stop when both layers look deliberate.

How should you focus and expose?
Tap the reflected subject to set focus and exposure, then lower the brightness if bright areas lose detail. Take a test photo and inspect the lightest part of the image before changing anything else. The phone screen is a useful tool for checking clipped highlights and distracting details before you shoot again.
This matters because reflections often contain bright sky or lights beside darker surroundings. Automatic exposure may protect shadows and wash out the reflection. A darker capture can preserve more highlight detail.
On an iPhone, Apple explains how to move the focus. Google offers guidance on focus and exposure for compatible Pixel phones. Labels and controls differ by model, so use your camera app’s closest equivalent.
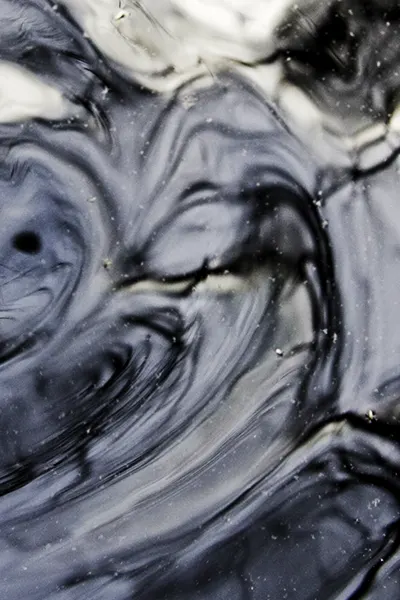
Choose a composition that supports the subject.
Start with symmetry when the subject and reflection have strong, clean shapes. Place the dividing line near the centre and compare the space given to the real subject and its reflected copy. Use the grid or level if it helps keep the frame straight.
Symmetry isn’t the only choice. Move the dividing line off-centre when one half has better colour or detail. Fill the frame with the reflection, crop out the original subject, or rotate the photo for a visual puzzle. Creative reflection photos often come from testing these less obvious arrangements rather than centring everything.
Ripples, scratched metal, and uneven glass can distort a reflection. Use broken shapes for texture or movement, and choose still water for a calm mirror effect. This kind of experimentation is useful in creative photography because distortion can become part of the composition.
Match your approach to the surface.
Different surfaces need different camera positions. Use this table as a starting point, then move until the reflected subject looks clean.
|
Reflective surface |
Best starting approach |
Common problem |
|---|---|---|
|
Puddle or wet pavement |
Lower the lens near one edge |
Phone or street clutter enters the frame |
|
Window or glass door |
Move sideways and shade the lens |
Your body or bright room lights appear |
|
Mirror or polished metal |
Check every edge before framing |
Camera and hands hide part of the subject |
|
Calm water |
Wait for less wind and test several heights |
Ripples break fine detail |
Never step into traffic for a puddle photo. Avoid unstable banks, slippery rocks, deep water, and moving water. A reflection isn’t worth risking your safety or your phone.
Remove distractions before clicking
Scan the corners, edges, and brightest areas before pressing the shutter. Look for your reflection, the phone’s outline, lights, signs, rubbish, branches, or people that merge with the subject.
Reflections in phone photography can look confusing when the direct scene and the reflected scene compete with each other. Simplify one layer by moving closer, changing height, or using a clean background. Move sideways if a window reflects your hands.
Keep the flash off unless you have a specific reason to use it. Flash can create a bright spot on nearby glass or mirrors and overpower the detail you wanted to record.
Use a five-step reflection routine.
Use the same quick routine each time you find a promising surface. Think of it as a short tutorial for capturing reflections with a smartphone, and it works just as well for mobile shooting:
- Find the reflected subject and decide why it belongs in the photo.
- Position the lens by testing a low, high, and sideways angle.
- Simplify the frame by checking your reflection, background, and edges.
- Tap the important detail, adjust brightness, and take a test photo.
- Shoot several small variations before the light or surface changes.
Compare reflection images at full size. Check sharpness, bright detail, and the dividing line. The best reflection is the one with the clearest idea, not necessarily the most perfect mirror image.
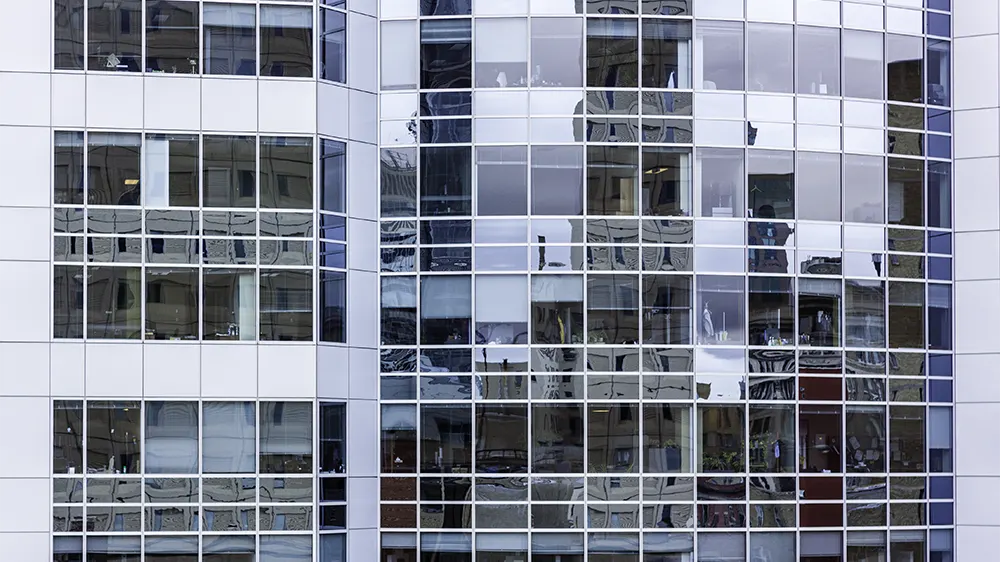
Edit while keeping the reflection believable.
Begin with the crop and straighten tools. A precise crop can improve symmetry, remove a distracting edge, or let the reflection become the main subject. Try rotating the photo 180 degrees if the inverted view makes the reflected subject easier to read.
Adjust brightness and highlights before adding colour. Lower washed-out highlights, then lift shadows enough to reveal useful detail. There is no single editing setting that suits every reflective surface. Strong clarity, sharpening, or saturation can make water and glass look harsh, so compare with the original.
Keep Learning
Your next move with the camera
You’ve got the controls. These are the guides I’d hand you next. Each one picks up where the other left off. Written from the same real photo shoots
-
How to Take Better iPhone Photos With Simple Fixes
How to Take Better iPhone Photos With Simple Fixes Most phone photos don’t fail because the camera is…
-
How to Take Better Photos With Your Phone
How to Take Better Photos With Your Phone How to take better photos with your phone starts with…
-
How to Use Android Camera Controls for Better Photos
How to Use Android Camera Controls for Better Photos I’ve found that most beginners don’t need more camera…




RECOMMENDED EDITOR
On1 Photo RAW – For when you outgrow the build in phone editor
The mobile editor I reach for my serious shots. Free 30-day trial
Conclusion
Good reflection photos come from position and intent more than from specialty equipment. Decide what the reflection adds, move until its shape is clear, and protect bright detail before shooting.
Practise reflections with phone photography on one simple surface, such as a window or a puddle. Take five angles, compare the results, and keep the version where the reflection makes the subject easier or more intriguing to see.
About Bob Wild
Bob is a fine-art photographer on Vancouver Island and the creator of Phone Photo Guide, and the founder of Who Said Photography. He shares practical mobile photography tips based on real shooting situations, including portraits, natural light, composition, and everyday phone editing.