
Better Selfies With a Smartphone: Simple Tips That Work!

Bob Wild
Fine Art Photographer, Vancouver Island
Founder of Who Said Photography | 20+ years shooting | I try and test every tip on real shoots before it goes on the page
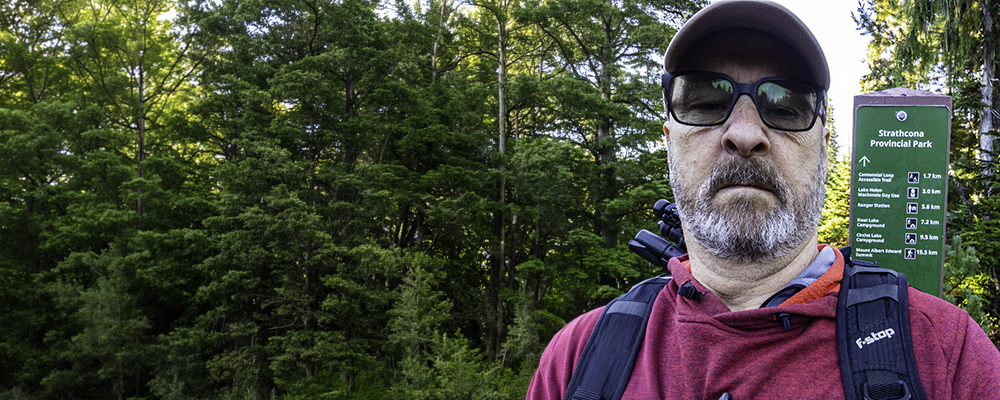
Learning to take better selfies with a smartphone wasn’t something I ever expected to have to learn. Being a boomer, selfies weren’t part of my childhood, and it took me a while to figure out why I could take a good photo but a bad selfie.
There are a few basics you need to know: soft light, a comfortable distance, and a steady grip. Harsh light can deepen shadows, holding the lens too close can stretch features, and a small hand movement can soften the image.
If you’re figuring out the basics, those are the things I’d start with before adding filters. You don’t need to get everything right at once. Start with light and distance, compare a few photos, and see what works for you.
Key Takeaways
Face soft window light so your skin tone looks even and clear.
Hold the phone farther away to reduce close-range facial distortion.
Keep the lens near eye level for a natural starting angle.
Use a timer or gesture to avoid shaking the phone while shooting.
Check background edges before shooting so distractions don’t weaken the portrait.
How do you find flattering light?
Face a large, soft light source, such as a window or open shade. Turn a little until both eyes are bright and the shadows on your face look gentle.
Light matters because the front camera has less room to recover deep shadows and bright highlights together. Better selfies with a smartphone come from improving the light first, not raising the exposure until the background turns white.
Avoid a bright window or sunset directly behind you unless you want a silhouette. Midday sun and bare ceiling lights can also create hard shadows. If this is the light you have, then move into a shaded area, face the window, or soften harsh sunlight with a thin curtain.
Natural window light is a useful starting point for your selfies. Outdoors, try morning or late afternoon when direct sunlight is less intense than at noon; watch for harsh shadows on the ground rather than relying on the clock. Indoors, a diffused ring light can help when window light is unavailable.
A lens cloth makes it easy to remove a smudge from the camera lens. Check the phone’s front-facing lens before taking photos, especially after handling the screen.
Where should you hold the phone?
Start with the lens near eye level and the phone at arm’s length. Move it slightly higher, lower, or to one side. Small changes are easier to judge than a steep angle.
Distance and camera height can change the perspective. When using the wide lens and holding the phone close, your features will look larger than the rest of the face. Holding the phone farther away provides a more natural starting point and leaves room for a modest crop.
Look at the lens for direct eye contact. Watching your face on the screen can make your eyes appear off-camera. For a relaxed expression, breathe out, lower your shoulders, and change your head position between frames.
Try to hold the camera slightly above eye level, then compare that camera angle with a straight-on frame. A higher angle can make you look different, but the version that looks best depends on your expression and the perspective you prefer. Turn your head a little and check how your face looks in each saved frame.
If reaching farther is uncomfortable, consider using a selfie stick. Using a selfie stick adds distance without stretching your arm; keep the support steady when you hold your phone. Wide-angle lenses can exaggerate nearby features, so distance helps reduce distortion from shooting too close.

How can you avoid blurry selfies?
Hold the phone with both hands, tap your face to guide focus, and press the shutter gently. In dim light, brace your elbows against your body or place the phone on a stable surface.
Pressing an on-screen shutter can twist the phone at the exact moment it takes the picture. A short timer gives you time to settle your hands and expression before the photo is made.
Timers are available on iPhone and Pixel models. Pixel 6 and later can also start a timer when your face and raised palm are visible. Many Galaxy phones offer palm, voice, volume-key, or floating-shutter controls. Names and availability can change by model and software version, so check your camera manual.
A tripod lets you take a photo without balancing the phone on an edge. This is useful when taking a portrait or a wider self-portrait: set the frame first, then step into position. You can often get better results by supporting the phone instead of reaching awkwardly while pressing the shutter.
Choose a clean, useful background.
Scan all edges of the frame. Watch for bright signs, door frames, or plants that seem to grow from your head. A simple background keeps attention on your face without needing to be an empty wall.
Step away from the background to reduce wall shadows and give the scene more depth. Outdoors, choose a setting that explains the place without competing with you.
For a group selfie, use the wider front-camera view only when you need it. Keep faces away from the extreme corners, where a wide view may stretch them. Ask everyone to move closer together before changing to digital zoom.
When taking selfies with friends, keep the most important faces near the middle of the frame. Move the phone or the group before cropping tightly; small positioning changes can make the photo feel less crowded.

Frame faces without crowding them
Leave space above your head and include your shoulders for an intentional crop. Keep your face large in a profile image, but leave more room for a travel setting.
Turn your body slightly, then bring your eyes back toward the lens. Keep your chin comfortable because pushing it far up or down can create tension.
For an environmental portrait, try the rule of thirds: place yourself slightly to one side so the photo has room to include the surroundings. Compare photos using centred and off-centre framing. Better photos come from choosing what belongs in the frame, rather than using hard and fast composition rules.
CAUTIONS: Stay aware of your surroundings; don’t step backward while watching the screen near roads, stairs, water, or ledges.
Use camera features with care.
Phone controls can solve a specific problem, but they can’t replace good light and framing. Start in photo mode. Use portrait mode when you want background separation, and the phone can detect your outline.
|
Selfie problem |
Useful first fix |
Trade-off to check |
|---|---|---|
|
Shaky grip |
Use a timer or hands-free shutter |
You need a stable place for the phone |
|
Busy background |
Try Portrait mode or step away |
Hair and glasses may show rough blur edges |
|
Group feels cramped |
Select the wider selfie view |
Faces near corners may look stretched |
|
Saved photo looks reversed |
Check the mirror-selfie setting |
Text and familiar details will flip too |
On iPhone, you can opt to have the saved selfies match the preview. Seek the option labelled “Mirror Front Camera.” Pixel names its related option. Save the selfie as you see it. The wording for Galaxy may vary. Neither option improves picture quality. It just tells if the saved file is the same or flipped compared to the preview.
Use face retouching at a low setting, if you use it at all. Strong smoothing can remove real skin texture and make the result feel artificial. Check the saved image, because some phones show the full retouching effect only after capture.
Many phones offer features like HDR or burst mode, although availability varies. Check what your camera’s controls actually do before relying on them: HDR can help balance bright and dark areas, while a burst captures several frames quickly. Neither guarantees outstanding photos if the light or framing is weak.
Avoid heavy filters and excessive skin smoothing when you want to look natural. In an editor such as Snapseed or On1 Mobile, start with small brightness and colour adjustments. A professional-looking result still shows skin texture; simple techniques often do more for great selfies than strong retouching.
Follow a simple selfie routine.
Use this short routine until it becomes automatic:
- Clean the lens and find soft light that reaches your face.
- Choose a background, then stand a few steps in front of it.
- Hold the lens near eye level and keep a comfortable distance.
- Tap your face, check brightness, and look toward the lens.
- Use a timer or steady grip and take several small variations.
- Review sharpness, expression, background edges, and the saved orientation.
This routine helps you diagnose a weak photo. If the face is dark, change the light. If features look stretched, add distance. If the expression feels stiff, use the timer and move gently between frames.
Once you know how to make a repeatable setup, compare your best selfies and note what worked and what didn’t. Treat tips and tricks as experiments: change the light, distance, or expression so you can see which choice helped.
Keep Learning
Your next move with the camera
You’ve got the controls. These are the guides I’d hand you next. Each one picks up where the other left off. Written from the same real photo shoots
-
Flower Photos With Phone: Beautiful Flower Photography Tips
Flower Photos With Phone: Beautiful Flower Photography Tips Flower photos with phone can turn out wonderful, but have…
-
How To Adjust Exposure on iPhone Before You Take the Shot
How To Adjust Exposure on iPhone Before You Take the Shot I learned how important it is to…
-
How to Make iPhone Photos Brighter Without Overexposing
How to Make an iPhone Photo Brighter Without Overexposing When I want to make iPhone photos brighter, I…



RECOMMENDED EDITOR
On1 Photo RAW – For when you outgrow the build in phone editor
The mobile editor I reach for my serious shots. Free 30-day trial
Conclusion: Take one better selfie today.
Taking better selfies with a smartphone took me some time to figure out. If you’re learning too, I’d start with soft window light, a comfortable distance, and a steady grip. Check the background, take a few photos, and change one thing at a time so you can see what helps. You don’t need heavy filters or a perfect pose. Give yourself time to find an angle and expression that feel natural to you.
About Bob Wild
Bob is a fine-art photographer on Vancouver Island and the creator of Phone Photo Guide, and the founder of Who Said Photography. He shares practical mobile photography tips based on real shooting situations, including portraits, natural light, composition, and everyday phone editing.