
Flower Photos With Phone: Beautiful Flower Photography Tips

Bob Wild
Fine Art Photographer, Vancouver Island
Founder of Who Said Photography | 20+ years shooting | I try and test every tip on real shoots before it goes on the page
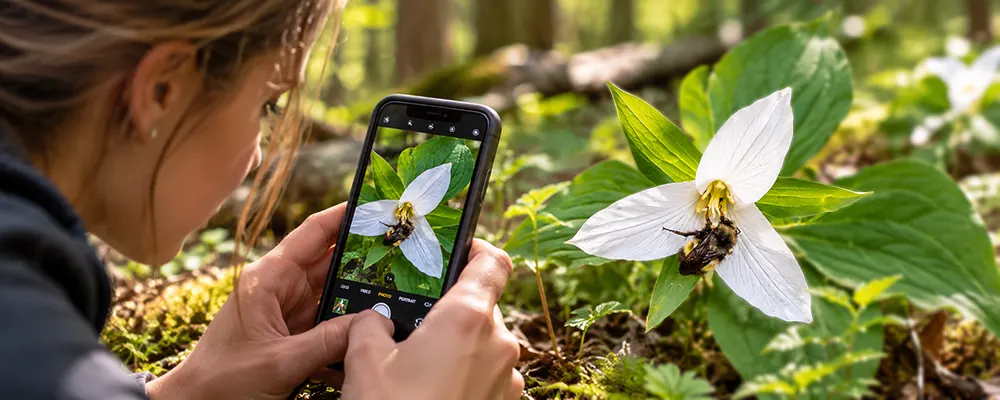
Flower photos with phone can turn out wonderful, but have you ever taken a picture of a beautiful flower only to wonder why it doesn’t look nearly as good as it did in front of you? I’ve been there! The colours look dull, the petals aren’t sharp, or there’s something distracting in the background.
I love photographing flowers because there’s so much to discover when you get a little closer. And the best part? You don’t need a fancy camera to capture details. A few small changes in how you use your phone can make a difference. Here are some easy tricks to try the next time you see a flower you want to photograph it.
Key Takeaways
Photograph flowers in soft light so that the colours and petal textures are visible.
Tap the nearest petal so your phone locks focus.
Back up when focus fails instead of forcing an extreme close-up.
Simplify the background before shooting so the flower remains the clear subject.
Wait for wind to stop so the moving petals are not out of focus or soft.
What light makes flowers look best?
Soft, light usually makes flowers look best because it shows their colour and texture without harsh shadows. Try open shade, a bright overcast sky, or indirect window light for flowers indoors.
Believe it or not, petals reflect more light than their surroundings. As a result, white, yellow, and pale pink areas may lose texture. If the leaves/petal areas are overexposed, tap to refocus the flower and slightly lower the exposure.
Direct midday sun can still work. Look for light passing through thin petals, or move until the flower sits against a darker background.
How close should you move?
For sharper flower photos with phone cameras, compare the closest sharp picture with one taken a little farther away. You can always crop the second photo later.
Every phone lens has a minimum focusing distance. Some smartphone cameras switch lenses when you get close, while others can’t focus.
For reliable flower photos with your phone, compare the closest frame with one taken farther away. You can crop the second version later.
Avoid heavy digital zoom. It enlarges the image but doesn’t create detail. Test the telephoto lens button marked for use from a greater distance in excellent lighting conditions.
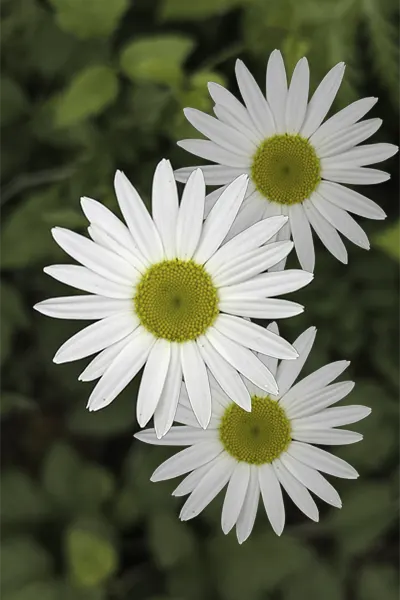
Digital zoom makes your subject appear closer by cropping into the image and enlarging what remains.
Where should you tap to focus?
Tap the nearest petal, the flower’s centre, or the feature you want viewers to notice first. Wait for the focus to settle before taking the picture.
A flower has depth. If the phone chooses a petal at the back, the front edge may be soft even though part of the bloom is sharp. A precise tap tells the camera where to focus.
Keep the phone parallel to a flat flower when you want more of its face to be sharp. For a side view, place focus where it best supports the shape.
Choose a cleaner flower background
Check the whole frame, not only the flower. Bright sky, labels, paths, dead leaves, and crossing stems can pull attention away from the subject. Even ‘me’ an experienced photographer, benefits from checking the edges before shooting.
Try different angles move sideways, raising or lowering the phone, or rotate around the bloom before changing camera settings. A change of a few centimetres can place a dark shrub, open sky, or distant garden behind the flower. More distance between the flower and background also helps the background look less defined.
Keep the edges simple. Include the full flower with breathing room, or crop close enough that your choice is clear.
Keep flowers sharp when the wind blows.
Wind is your enemy when shooting closeup, so holding the phone steady solves only half the problem. Watch the bloom for a few seconds and press the shutter during a pause in the wind.
Brace your elbows, hold the phone with both hands, and press the shutter gently. Your volume button may act as a shutter, or use your timer if tapping the screen moves the phone.
Use Burst, Motion Photo, Live Photos, or a similar feature when available. Review the frames at full size. Don’t hold or bend a wild flower to stop it moving.
Frame one bloom or a group.
A single bloom needs a clear point of attention. Show its shape, then keep the centre or strongest petal away from distracting edges. Try placing the main flower along a third of the frame to create a more balanced composition.
A group needs an order. For a bouquet, choose one leading flower and let the others support it, or step back far enough to show a repeated pattern. If every bloom has equal weight, the picture may feel busy.
Use this quick guide before you shoot:
|
Situation |
Start with |
Watch for |
|---|---|---|
|
Single bloom |
Main camera and a close, sharp distance |
Cut petals and bright edge clutter |
|
Flower group |
Wider framing with one leading bloom |
No clear subject or messy overlaps |
|
Tiny detail |
Supported macro mode or a later crop |
Focus hunting and soft corners |
|
Windy scene |
Brighter light and several frames |
Subject motion between shots |
How to improve flower photos with phone camera settings
Macro mode is useful for pollen, petal texture, and tiny flowers if your phone has it. Watch for an automatic lens switch and compare the result with the main camera from farther back. Your normal shooting mode may have better detail or a calmer background.
Here a trick! Try portrait mode, as it can separate a larger flower from its background. Switch back to normal if parts of the bloom look cut out or blurred.
Tips for beautiful flower photography with phone doesn’t have to be complicated. Here’s the simple routine I like to follow:
- Clean the lens and find soft, bright light.
- Choose one flower or one clear pattern.
- Move close, then back away if focus struggles.
- Tap the key detail and check the exposure.
- Scan the background and all four edges.
- Take several frames, then compare them at full size.
Keep Learning
Your next move with the camera
You’ve got the controls. These are the guides I’d hand you next. Each one picks up where the other left off. Written from the same real photo shoots
-
Common Mistakes Mobile Photographers Make for Beginners
Common Mistakes Mobile Photographers Make: Beginners Guide Common mistakes mobile photographers make often has less to do with…
-
How To Adjust Exposure on iPhone Before You Take the Shot
How To Adjust Exposure on iPhone Before You Take the Shot I learned how important it is to…
-
How to Make iPhone Photos Brighter Without Overexposing
How to Make an iPhone Photo Brighter Without Overexposing When I want to make iPhone photos brighter, I…



RECOMMENDED EDITOR
On1 Photo RAW – For when you outgrow the build in phone editor
The mobile editor I reach for my serious shots. Free 30-day trial
Conclusion: Tips for beautiful flowers
Getting beautiful flower photos with phone is easier than you might think. I’ve found that soft light, stay within the lens’s focusing range, tap the feature that matters, and move until the background supports the bloom.
Use the routine on one flower before trying a full garden. You will see which change improves the picture, and you can repeat that choice on the next subject.
About Bob Wild
Bob is a fine-art photographer on Vancouver Island and the creator of Phone Photo Guide, and the founder of Who Said Photography. He shares practical mobile photography tips based on real shooting situations, including portraits, natural light, composition, and everyday phone editing.