
Close-Up Photos With iPhone: Easy Macro Photography Tips

Bob Wild
Fine Art Photographer, Vancouver Island
Founder of Who Said Photography | 20+ years shooting | I try and test every tip on real shoots before it goes on the page
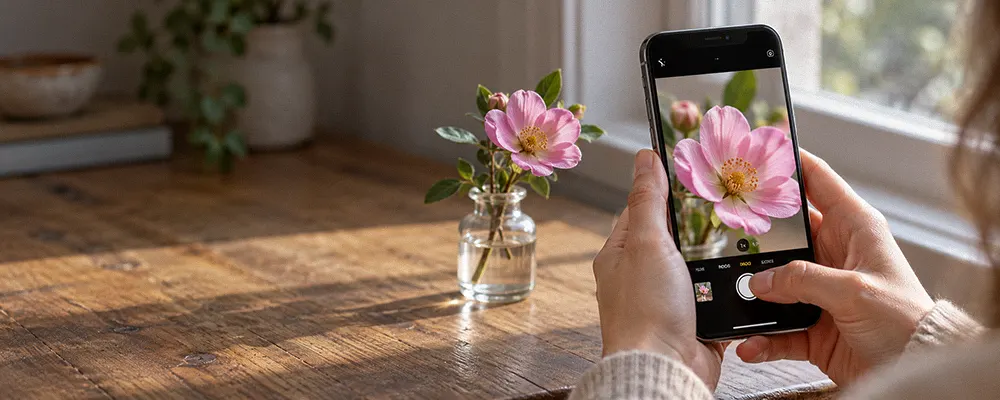
Every morning, I head into the woods to walk the dog, and my phone is always in my pocket. I often wonder, “What close-up photos will I take with my phone today?”
Good macro compositions start with a sharp subject, not maximum magnification. In this guide, I will discuss the fundamentals of using your phone for macro photography, including how to find a suitable distance, optimize lighting, and stabilize the phone before clicking the shutter.
Key Takeaways
Back away slightly when focus hunts so the lens can lock sharply.
Before shooting, tap the key detail to ensure that attention is directed appropriately.
Add soft side light to reveal texture without creating harsh glare.
Brace the phone and shoot several frames to reduce small movement errors.
Crop a sharp photo modestly instead of forcing heavy digital zoom.
Why do close-up photos with phone look blurry?
A dirty camera lens can hide texture, so wipe it with a clean microfibre cloth first.
Tapping the screen can’t overcome a phone’s focusing limit. If the focus indicator pulses or the detail stays soft, move the phone back a little. Tap what you want as the most important subject, then wait for the preview to settle.
When a subject has depth, its front may be sharp while the back looks soft. This becomes especially noticeable in an extreme close-up due to the phone’s limited depth of field. Choose the one detail that must look crisp.
How close should you hold the camera?
There isn’t one correct distance because each lens and phone model has its own focusing range. To get close to the subject, start farther back and move in slowly. When focus fades, return to the last sharp position, then leave a small margin for movement.
Verify the lens’s minimum focusing distance rather than judging close-focus ability. Tiny shifts change the distance between the camera and the subject, so avoid working right at the focusing limit.

Which phone lens should you choose?
Start with the normal lens for dependable colour and detail. Check your camera app for a macro setting if you need a closer view.
Smartphones with built-in macro support may switch cameras automatically, changing framing and low-light quality. Watch for a flower icon or a visible jump. If detail looks smeared, back away and return to the main lens.
|
Lens or mode |
Best use |
Watch for |
|---|---|---|
|
Main lens |
Sharp everyday details in good light |
Back up when focus starts hunting |
|
Macro or close-focus mode |
Very small subjects on supported phones |
Lens switching, shadows, and narrow focus |
|
Telephoto lens |
Larger details from a comfortable distance |
Some lenses can’t focus on nearby subjects |
If your phone lacks an option for you to use the macro function, consider an external macro lens. A dedicated macro lens attachment, such as a clip-on lens, fits over the smartphone. Check compatibility and alignment; working distance and image quality vary.
Avoid heavy digital zoom. It crops the camera image, making blur and noise easier to see. Capture a sharp frame first, then crop modestly in post.
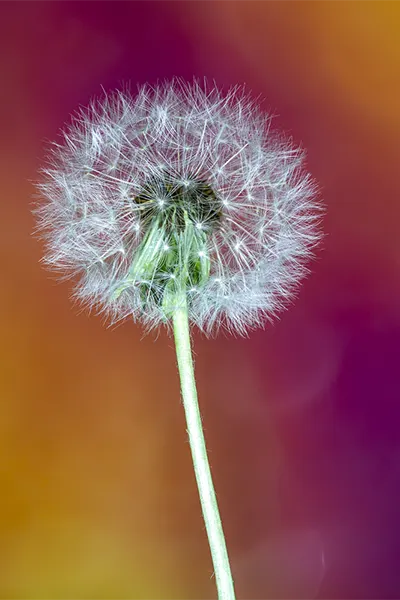
Use light without casting shadows.
With macro photography, you want to capture the details, hence the need for light without bright glare. Open shade and window light are useful; they’re broad and soft. Side light helps small ridges create gentle shadows.
Before taking a picture, check whether the phone blocks the light. If it does, change your angle or back away. A white card can bounce light into dark areas.
Avoid the built-in flash at very close range because it can create glare or a phone-shaped shadow. For shiny subjects, change the angle to reduce reflections on the leaves.
Keep the phone and subject still.
To steady the phone camera, hold the phone with two hands, tuck in your elbows, and press gently. Rest against a table or wall, or use a small tripod when possible.
Use a short timer if touching the screen moves a supported setup. For nature photography, wait for a lull in the breeze before making macro photos of plants.
When setting up a macro shot, tap focus again if you change your distance or angle.
Build a simple composition.
In macro photography with your phone, concentrate on the main detail, then remove distracting edges, labels, and bright spots. A small change in your position can simplify the background.
Remember to leave space around the subject to allow for straightening and cropping during editing. Centre symmetrical objects when it feels deliberate. Place other details off-centre when they improve balance.
Try this quick macro routine.
Use the same order each time so you solve the largest problems before adjusting small details:
- Clean the lens and choose a subject with a clear point of interest.
- Find soft light, then check that the phone isn’t casting a shadow.
- Start with the main lens and move closer until focus becomes unreliable.
- Back away slightly, tap the key detail, and confirm it looks crisp.
- Brace the phone, take several frames, and vary the angle once.
- Review at full size before cropping or adding extra sharpening.
Compare the intended detail at full size, not only the overall brightness.
Keep Learning
Your next move with the camera
You’ve got the controls. These are the guides I’d hand you next. Each one picks up where the other left off. Written from the same real photo shoots
-
Flower Photos With Phone: Beautiful Flower Photography Tips
Flower Photos With Phone: Beautiful Flower Photography Tips Flower photos with phone can turn out wonderful, but have…
-
How To Adjust Exposure on iPhone Before You Take the Shot
How To Adjust Exposure on iPhone Before You Take the Shot I learned how important it is to…
-
How to Make iPhone Photos Brighter Without Overexposing
How to Make an iPhone Photo Brighter Without Overexposing When I want to make iPhone photos brighter, I…


RECOMMENDED EDITOR
On1 Photo RAW – For when you outgrow the build in phone editor
The mobile editor I reach for my serious shots. Free 30-day trial
Conclusion: Get sharp before getting closer.
Better close-up photos with iPhone start with clear focus, soft light, and a steady hand. If moving closer makes the detail blurry, back away and leave room for a modest crop.
Try a few distances and angles, then compare your photos at full size. Keep the frame that shows the texture clearly and gives the subject a simple, uncluttered background.
About Bob Wild
Bob is a fine-art photographer on Vancouver Island and the creator of Phone Photo Guide, and the founder of Who Said Photography. He shares practical mobile photography tips based on real shooting situations, including portraits, natural light, composition, and everyday phone editing.